cupcakes

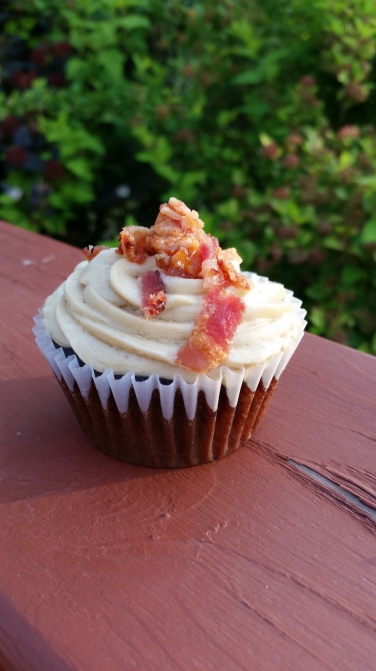
Dairy Free Chocolate Maple Bacon Cupcakes

wpid-20150624_195908.jpg

Yes, you read that correctly–I put chocolate, maple and bacon together. In a cupcake. Win, win, win, win!

I got the idea from this bacon cupcake but honestly didn’t really follow that recipe at all. For starters, that cake recipe called for sour cream, which is really impossible to substitute for when one is trying to make it dairy free. But the part that really turned me off of that recipe was that she put chopped up bacon inside the batter. I do not like soft bacon, and I knew that there was no way for the bacon to stay crispy after being baked inside a cupcake. So I took this marvelous idea for a bacon cupcake and made it my own.

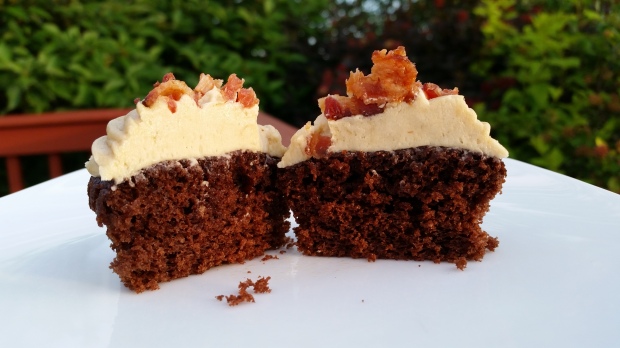
The cake recipe is from one of my favorite dessert cookbooks: Hershey’s Recipe Collection. I’ve had this since my single days, and I love it! Since I knew that the bacon and maple frosting was going to be pretty heavy, I wanted to go with a light and fluffy cake instead of dense and moist like I would usually pick. Hershey’s “1st Birthday Cupcakes” were exactly what I was looking for. Light, soft, fluffy, chocolately goodness, but not dry. There’s not as much cocoa powder in this recipe as compared to most other chocolate cake recipes, putting it more in the family of red velvet, but without all the food coloring. It’s perfect if you want a chocolate cake that still has all the glory that is chocolate without weighing you down.

wpid-20150624_200317.jpg

A note before I dive into the recipe: it calls for buttermilk, which can normally be substituted with a regular milk that is “soured” by distilled white vinegar. If you decide to use soy milk (or regular cow milk if you don’t have any allergies to worry about), then you can add the vinegar to the milk and then add that mixture to the batter. However, if you are using almond milk like I did, do NOT add the vinegar directly to the milk. It causes it to separate and when you add it to the batter, it doesn’t incorporate well. You have to add the milk and vinegar to the batter separately. Moreover, if you are a dairy eater and are using buttermilk, then omit the vinegar completely.

So here’s the recipe for these little lovelies (it will make a little over 2 dozen cupcakes).

Ingredients for Chocolate Cupcake:

  • 1/2 cup of all vegetable shortening
  • 1 1/2 cups of sifted sugar
  • 2 eggs
  • 1 1/2 cups of sifted flour
  • 1/2 cup of sifted cocoa powder
  • 1 teaspoon of baking soda
  • 1 teaspoon of salt
  • 1 teaspoon of baking powder
  • 1 1/2 cups of almond milk
  • 4 1/2 teaspoons of distilled white vinegar
  • 1 teaspoon of vanilla extract

Directions:

  • Pour the almond milk into a glass measuring cup and mix in the baking powder. Baking powder is liquid reactive, so this will allow it to start activating before you add it into the batter, and give the batter a fluffier texture.
  • Cream the shortening with 1/2 cup of sifted sugar with the flat beater attachment until smooth.
  • Add the eggs, mixing well after each one.
  • Add the remaining sugar.
  • Add the baking soda, salt, and vanilla extract, allowing them to mix in.
  • Next, add the flour and cocoa powder. As you start the mixer, slowly add the almond milk so that the batter stays moist and doesn’t get crumbly.
  • Once everything is incorporated nicely, add in the vinegar.
  • Pour into cupcake pans and bake at 350 degrees for 20 minutes, or until it springs back when touched.

Now that the cupcakes are baked, let’s move on to the maple frosting.

As is the case with all of my frosting recipes, I did use a stick of margarine, which is not 100% dairy free. It contains the milk derivative ‘whey’. So if you have an allergy that cannot tolerate whey, you can use all vegetable shortening instead. Trust me, it will still be just as delicious!

Ingredients for Maple Frosting:

  • 1 stick of room temperature margarine
  • 1 cup of all vegetable shortening (or 1 1/2 if using all shortening)
  • 1/3 cup + 2 tablespoons of maple syrup (Please buy the real deal; Aunt Jemima ain’t gonna cut it this time! Pure maple syrup is the only way to do these babies justice.)
  • 4 cups of sifted powdered sugar
  • 1/2 – 1 teaspoon of sea salt
  • 1 teaspoon of vanilla extract

Directions:

  • I used to roll my eyes whenever I read “room temperature” anything in baking recipes, but I am noticing that it really makes a huge difference to use room temperature margarine where frosting is concerned. It’s just too hard to get it to smooth out nicely if it’s too cold. What’s that? You don’t have the patience or planning abilities to remember to set a stick of margarine out 2 hours before you’re ready to start baking? Me neither! Here’s a nice hack for you: put the stick of margarine in a microwave safe bowl, cover it with a paper towel to contain potential splatters, and pop it in the microwave for 10-15 seconds. And just like that, you have room temperature margarine! Just be careful to not over heat it, which can happen quickly in the microwave. If it gets melty then you’ll have to trash it and try again. Runny margarine will completely ruin the texture of the frosting.
  • Once the margarine is room temperature, cream it using the flat beater attachment on the ‘2’ setting until it’s smooth.
  • Add the vegetable shortening and cream it on the ‘2’ setting, again until smooth. This may take a bit, and you may be tempted to up the speed, but don’t do it! Incorporating too much air is the death of smooth frosting.
  • Add in the first 2 cups of sifted powdered sugar 1 cup at a time, allowing it to completely mix in before adding more.
  • After the second cup of powdered sugar, add in the maple syrup and vanilla extract.
  • Add in the remaining 2 cups of powdered sugar, again 1 cup at a time. (I know this seems like a lot of powdered sugar, but the salty bacon will off set it. Plus the maple syrup makes it pretty soft; it really needs the extra powdered sugar to help it thicken up.)
  • Lastly, add in the sea salt. I feel that this part is all a matter of preference, so start with 1/2 teaspoon and taste it before adding in the other 1/2. I ended up going with a full teaspoon, but honestly once I topped it with bacon, it was almost a tad too salty. So take the sodium in the bacon into consideration too. Don’t get me wrong, the cupcakes were still awesome. I just realize that it might be a bit much for some people.

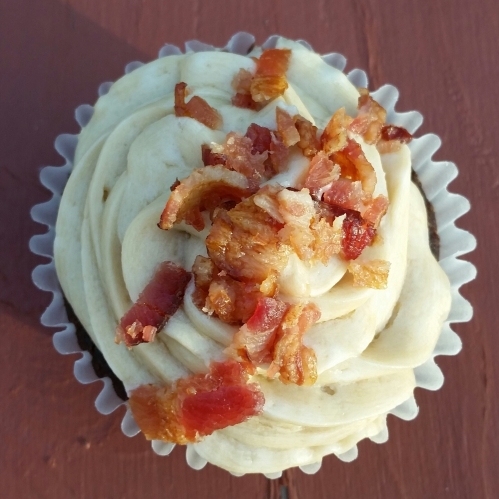
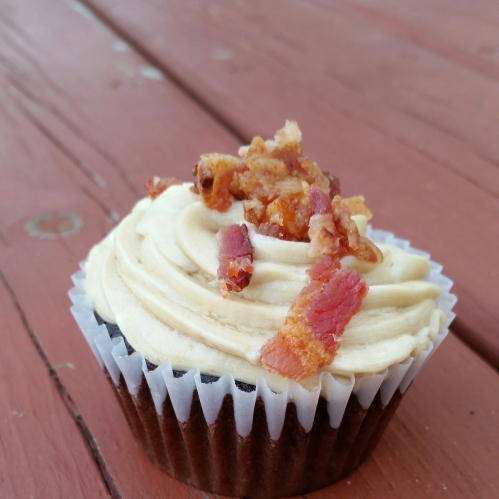
Then of course, there’s the most important component–the BACON! I used a total of 8 pieces of bacon. Personally, I like to cook my bacon in the oven because then there isn’t a bunch of grease splatters to clean up. 375 degrees for 20 minutes on a foil lined cookie sheet (it has to be a cookie sheet with a lip so the grease doesn’t spill out). When they’re done, pat the grease off with some paper towels. Then chop them up into little crunchy bits.

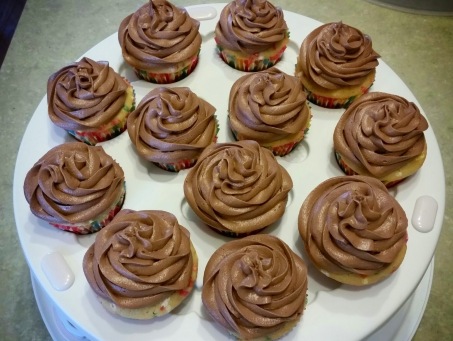
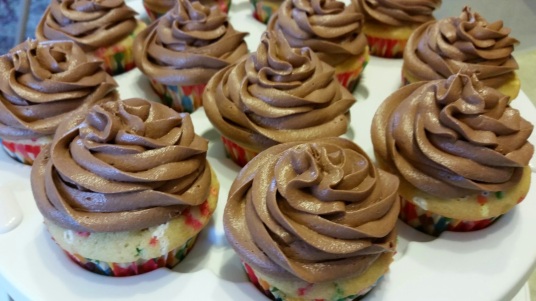
I chose to swirl the maple frosting on with my large open star tip, but use whatever you fancy. The frosting really just serves as the pillow to hold up the real prize of this cupcake–the bacon.

wpid-20150624_195915-1.jpg

It’s definitely more of a savory cupcake because it really isn’t very sweet. The chocolate and maple flavors are perfect side kicks to help highlight the salty, smokey, awesomeness that is bacon. I made them for Father’s Day, because they just seemed like a ‘manly’ cupcake. I mean, what guy doesn’t love bacon, right? Now I won’t lie to you–not everyone was crazy about them. They’re definitely a unique flavor that not everyone will be keen on. But the majority of people at the celebration really enjoyed them.

Bottom line–if you love bacon, you need to try these, because I don’t believe you will be disappointed!

wpid-20150624_200036-1.jpg

Happy Baking, Everyone!
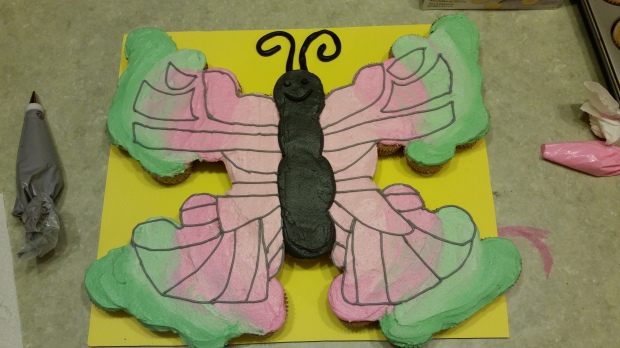
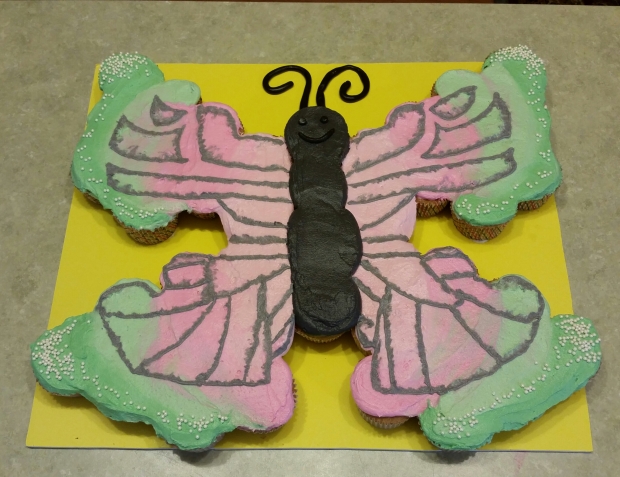
Butterfly Cupcake Cake

wpid-20150613_091032-1.jpg

A week or so ago, my 4 year old got invited to a birthday party for one of her dance friends. As per usual, I offered to do a cake for her as a gift, because I just love being able to bless people. Especially with cake. I mean, what better gift can you give than one that is loaded with sugar?

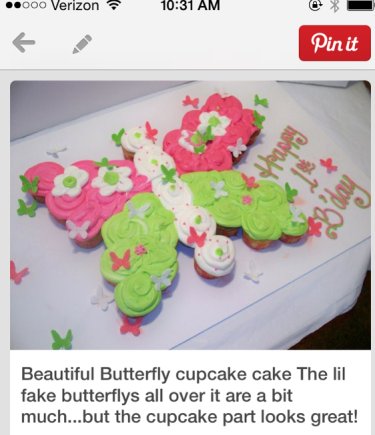
The theme of this party was butterflies. Her mom sent me this pin from pinterest for inspiration:

wpid-2015-06-22-09.33.24.png.png

I agree with whoever wrote the description–the mini butterflies are overkill. Plus, they don’t even make sense. Why would a butterfly have other butterflies all over it? And what’s with the ginormous daisies (?) on the wings? Probably the cake decorator was just trying to jazz up an otherwise boring design. Needless to say, I was not very inspired by this picture. What I took from it were the two most important requests: they want a cupcake cake in the shape of a butterfly and they want the color scheme to be pink and green. Pink and green is my least favorite color combination. But, this is not my cake! The birthday girl wanted pink and green, so I was going to give her pink and green.

After a Google search for pink and green butterflies, I saved these two to base my design off of:

wpid-15562872-pink-butterfly-isolated-on-white-background-stock-photo.jpg

wpid-green-black-butterfly.jpg


I loved the color gradient in both of these, and knew that would be the best way to blend the pink and green together. I decided to do a light pink, a dark pink, a light green, and a dark green, to give it a smooth transition.

To make this cake I used:

I made an exciting discovery through making this cake–foam craft boards do not absorb the oil from the frosting, and therefore do not get grease marks! Plus they come in different colors and are much larger than your average cake board, which is ideal for cupcake cakes. But since they are so large, be sure to measure the width and length of your fridge shelf and cut that bad boy down to size with an X-Acto knife before you start building your cake.

First thing is to color your frosting.

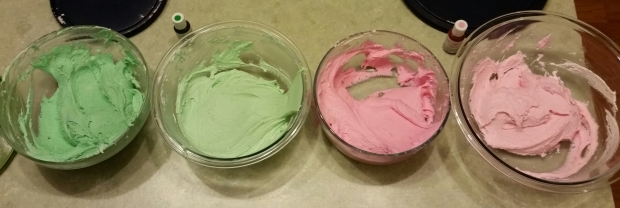
Take your first batch of vanilla frosting and divide it in half and separate into two different bowls. Using a toothpick, add a little bit of pink gel color to one bowl and mix it in to get a light pink. Again using a toothpick, add pink gel color to the other bowl of frosting, but this time add just a smidge more so that you end up with a darker pink. Adjust both colors until you are happy with them, but be careful not to add too much gel color. You can always add a bit more to darken it, but you can’t take any out if you add too much and need to lighten it.

Take the second batch of frosting, repeat the process, this time using green gel color.

wpid-20150612_232328-1.jpg

When you’re done, you should have a nice gradient of color ranging from light pink to dark green.

Take your third batch of frosting and scoop about a quarter of it into a clean bowl. Then add some black gel color and mix it in. It takes quite a lot of the gel color to get a nice black, so don’t bother with the toothpicks on this one; just squeeze big drops in until you’re happy with the tone of black.

For the veining detailing on the wings, I decided to use grey, because I thought black would be a bit harsh. In retrospect, I think white would have been the best pick. If you want to use grey like I did, then take another quarter of that last batch of frosting and color it grey using a toothpick and the black gel color. If you want to do it in black, then instead of coloring a quarter of a batch above, color half of the batch black. If you want to do it in white, then obviously, don’t do anything to it.

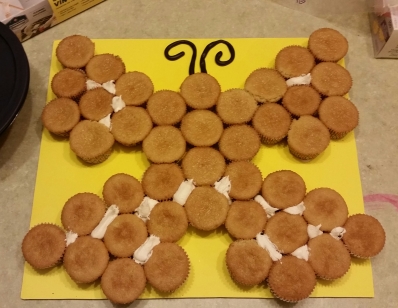
Once all your frosting is tinted, it’s time to put the cake together. If you haven’t already cut your foam board down so that it will fit in your fridge, do that now. Since the board is so thick, I found it was easiest to score the board to get through the first half of it, and then go over the line with the X-Acto again to cut all the way through.

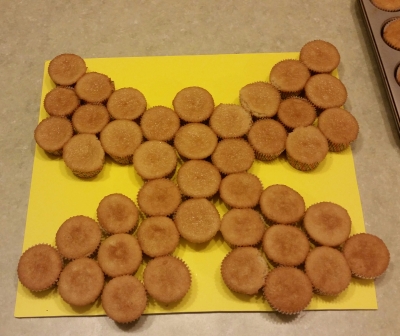
Then, assemble your cupcakes. Don’t attach them with frosting just yet; you’ll want to be able to move them around until you get the shape just right.

wpid-20150612_235203-1.jpg


Once you’re happy with your shape, carefully lift the cupcakes one by one and put a dollop of white frosting on the bottom and then reattach to the board. After you’ve done this to all of the cupcakes, fill in the gaps between cupcakes by piping white frosting directly into the holes. You don’t need to do this in between every single cupcake. Just fill in the larger holes so that when you’re frosting the “cake” the frosting won’t fall in between. You want to give the illusion that the top is one surface, so it has to be level and smooth.

wpid-20150613_003406-1.jpg

Then you need to let it sit in the fridge for 20 minutes so that the frosting can harden. This is a really important step so that the cupcakes don’t slide around on you.

While it was setting up in the fridge, I worked on the fondant pieces. I already had white marshmallow fondant on hand that I had made a couple weeks back, so I took some of that out and colored it black with the gel icing color. To do this I took a toothpick and dipped it into the gel color, then wiped the toothpick on the fondant. Then I kneaded it like a dough until the color was evenly distributed. Even though it was only a small amount of fondant, it still took forever to knead all the black in! Helpful tip–wear disposable gloves while doing this so you don’t stain your hands. Once it was black, I took a bit of fondant and rolled it in between my hands to make a long tube for an antenna. When I was happy with the thickness and length, I laid it out on the board to come out of the butterfly’s head. Then I repeated that process, trying to match the second antenna to the first as best I could. Since this was for a kid’s birthday, I decided to give the butterfly a face. Using a #5 Wilton decorating tip, I punched out eyes. Then I rolled out a little smile with my hands. I set the eyes and smile on a plate while I worked on the rest of the cake.

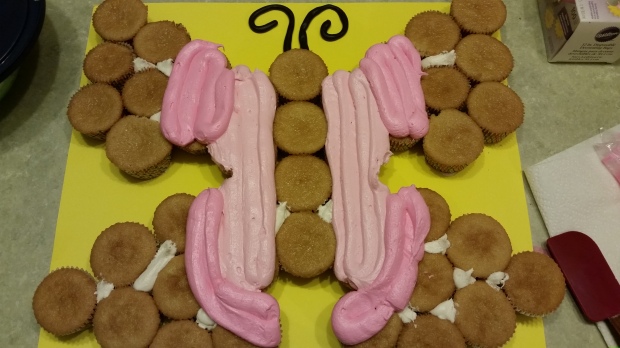
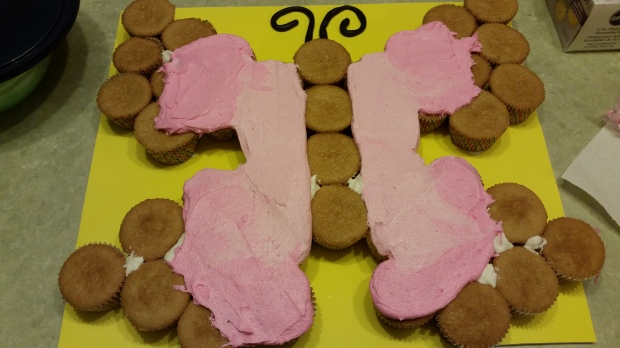
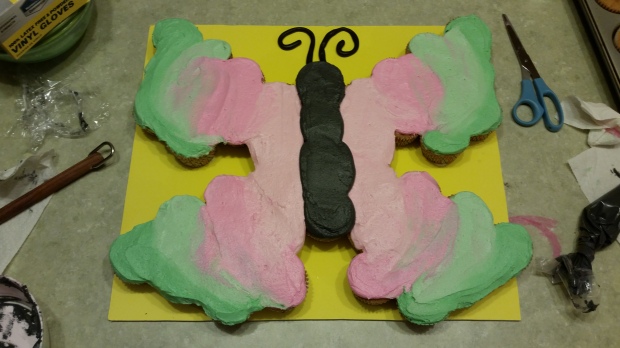
Once the frosting is set, it’s time to decorate. I started with the wings, so that if any of the frosting accidentally got smeared on the butterfly’s body I could just cover it up later. I put the light pink frosting in an icing bag, but didn’t bother with a tip; I just cut the end of the bag. I was using the piping bags so that I could better control where I placed the frosting, but ultimately was going to smooth over it with a spatula, so it didn’t need to be super precise. Then I piped columns of frosting up and down the two columns of cupcakes closest to the butterfly’s body. I covered the next “column” of cupcakes with the dark pink frosting.

wpid-20150613_004435.jpg

Then I took my offset spatula and starting at the body of the butterfly, slowly smoothed out the frosting. You’ll have to do it a couple of times, so be sure to wipe the spatula clean before going over it again so the dark pink doesn’t get mixed up in the light pink.

wpid-20150613_004922.jpg

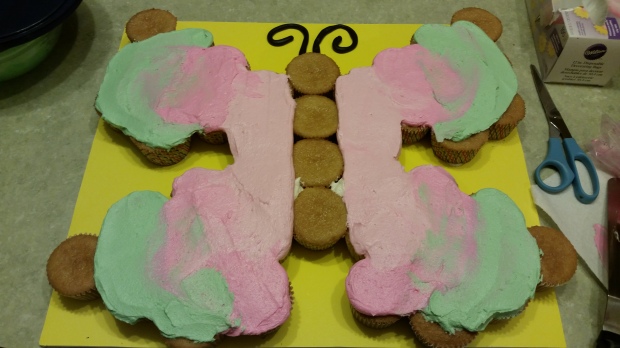
Once the pink is smoothed out, get your light green frosting and pipe it onto the next column of cupcakes. I wanted the pink to bleed a bit into the green, so when I went to smooth it out, I started in the dark pink and dragged it into the light green. It took a few strokes and you don’t want too much pink in the green, so be very careful to wipe the spatula clean each time.

wpid-20150613_010132.jpg

Finally, pipe on the dark green on the remaining cupcakes to make the wing tips of the butterfly. Since the dark green has the least amount of surface area, I didn’t want too much of the light green to bleed into it. Use extreme caution on this last smooth out. Then take the black frosting and pipe it onto the body of the butterfly. Smooth it out with your spatula, being really careful not to get any of it on your beautiful wings. You can put the fondant eyes and mouth on at this time.

wpid-20150613_013437.jpg

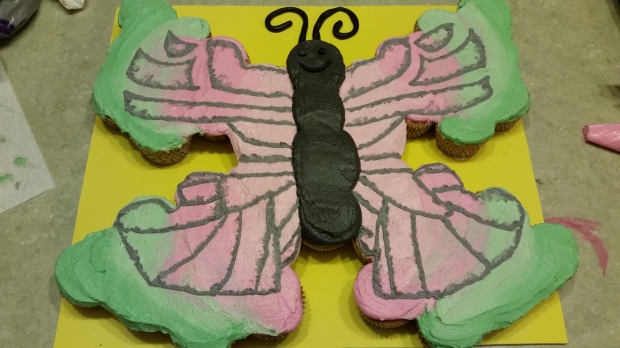
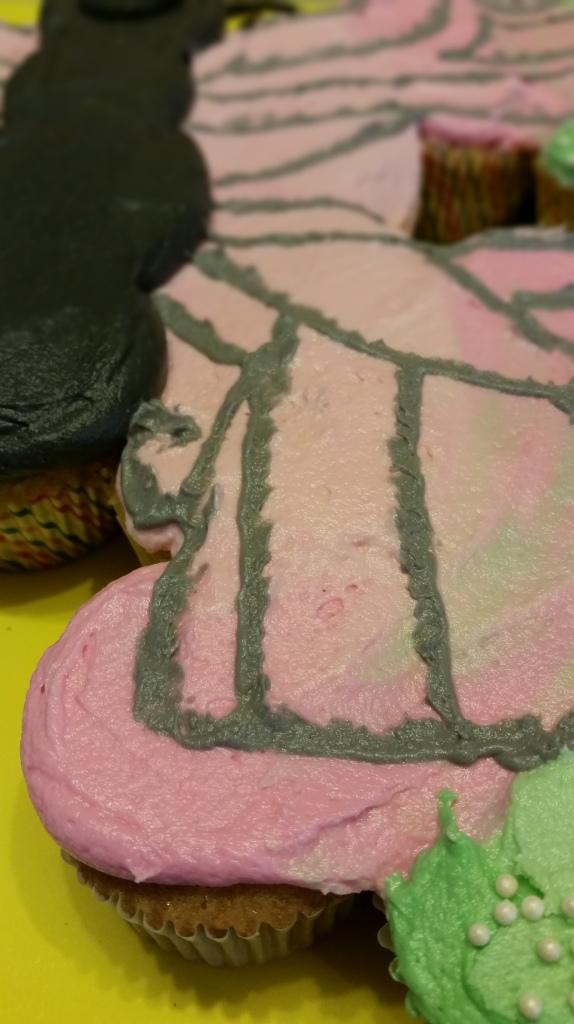
Using my butterfly pictures as a guide, I took a piping bag that was filled with the grey frosting and fitted with a #2 tip, and piped the veining. I’m right handed, so the right side was easier for me to do. The left side did not come out perfect, but since I was using regular frosting, I couldn’t just peel it off and try again like I can with royal icing, because regular frosting doesn’t harden the way royal does. Due to all of my kids being sick with colds and ear infections (and actually having to take our 2 year old to the ER because it got in her chest and she was having a hard time breathing), I had to do all of the decorating for this cake the night before the 11 am party. Thankfully, the baby allowed Daddy to hold her so she actually slept, allowing me to bang this bad boy out. Needless to say, I didn’t have time to make royal icing so I had to use regular frosting. If you have the time, I would highly suggest using royal icing for the veining. It’s much more forgiving.

wpid-20150613_020119.jpg

It looked a bit harsh to me like this. So in the haze of 1 in the morning logic, I decided to try a new technique: brush embroidery. Please note that this was really stupid, and I do not in any way endorse trying new things at the eleventh hour when you have no time to fix any potentially catastrophic mistakes. But that’s just kind of how I roll. I’m a perfectionist, and if something doesn’t look exactly right, I can’t just leave it. Since it was soft frosting on top of soft frosting (this technique is supposed to be done with royal icing), I thought using an actual paint brush would blend the grey frosting into the pink and green too much. So I chose to use the tip of a toddler butter knife instead. To do the effect, you simply put the brush (or knife, in my case) and place it on a spot of the line. Then you gently pull the frosting, giving it a brush stroke look. Repeat a gazillion times until every inch of grey frosting has been brushed.

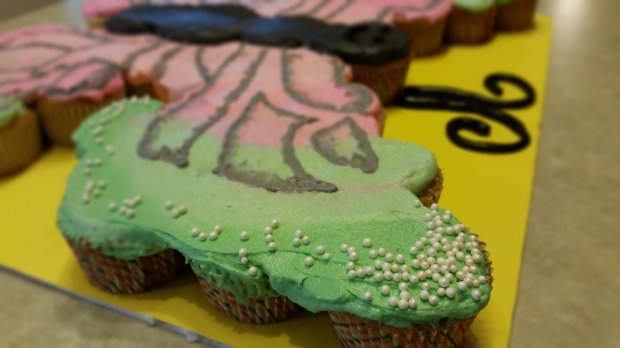
My gamble paid off, and it gave the effect that I was looking for! I like to think that it gives the wings the illusion of fluttering. It took forever to do, but I feel it was well worth it.

wpid-20150613_022242.jpg

wpid-20150613_091140.jpg

To finish it off, I placed white nonpareils on the wing tips.

wpid-20150613_091322.jpg

There you have it! A beautiful ombre butterfly cupcake cake.

wpid-20150613_091032-1.jpg


The birthday girl was very happy, and her mom called it, “Stunning!” I was very happy with the way it turned out and really enjoyed putting it together. If any of you try your hand at this cake, please share pictures of how yours came out!

The Best Dairy Free Chocolate Frosting

wpid-wp-1421600809992.jpegLast week I shared my favorite dairy free vanilla frosting with you, and today I am going to share it’s chocolate counterpart.

I know that dairy eaters would read the title of this post and scrunch their noses at chocolate that doesn’t have milk as if it were a mutant bastard child. But trust me–they would never know that this frosting didn’t have their precious dairy in it! It is not bitter at all, but is smooth and sweet, while still packing a full chocolate flavor.

I used it for my husband’s birthday cake this year, and he declared it his favorite frosting of all time. Considering that he’s a dairy loving Midwestern (from Wisconsin, no less), this was a very high compliment!

Try it out–you will not be disappointed!

A quick note: stick margarine is not 100% dairy free. It contains a milk derivative called ‘whey’. If you cannot tolerate whey, then use all vegetable shortening. The result will be just as delicious.

Ingredients:

  • 2 containers of marshmallow fluff (also called marshmallow creme)
  • 1 stick of margarine
  • 1 cup of vegetable shortening (or 1 1/2 cups, if you are omitting the margarine)
  • 1/2 cup of sifted cocoa powder
  • 2 1/2 cups of sifted powdered sugar
  • 1 teaspoon of vanilla extract
  • 2 splashes of vanilla almond milk

Directions:

  • Mix marshmallow fluff until smooth with the flat beater attachment on the ‘stir’ speed setting.(*HELPFUL TIP* Run a rubber spatula under hot water before scooping out the marshmallow fluff to make it come out super easy. It makes a world of difference getting all that sticky deliciousness out.)
  • Add half a margarine stick and mix on the ‘2’ speed setting until smooth. Then add the other half and mix until smooth.
  • Add the shortening half a cup at a time, allowing it to smooth out completely before adding more.
  • Add the SIFTED cocoa powder, again allowing it to smooth out completely.
  • Add 1 cup of SIFTED powdered sugar and mix until smooth. Add the rest of the powdered sugar 1/2 cup at a time, allowing the frosting to completely smooth out each time before adding more.
  • Add the vanilla extract.
  • If it seems a little thick, add a splash of almond milk. I usually end up adding 2 splashes, but this again is all a matter of preference.

The trick to this frosting is to not over whip it. If it gets too much air in it, then you will see holes in it when you are covering your cake. Do not put your mixer any higher than the ‘2’ speed setting. It will take longer, but be worth it when it comes out nice and smooth!

This recipe will yield enough frosting to cover two 8″ or 9″ round cakes, a 12″ x 9″ rectangle cake, or two dozen cupcakes. It will keep at room temperature for a couple days and for a couple of weeks in the fridge. It also freezes really well if you double wrap it tightly in plastic wrap and then store it inside a freezer Ziploc bag. I can’t say how long it will last in the freezer as I’ve only kept mine in there for 3 months, but I would think that as long as it’s not freezer burnt that it would be fine. If you freeze it, allow it to come to room temperature and mix it in your mixer on the ‘stir’ speed setting for a minute or two until it’s smooth.

Enjoy!

wpid-wp-1421600810109.jpeg

My Eggo is Prego: 37 Weeks

37 Weeks

37 Weeks

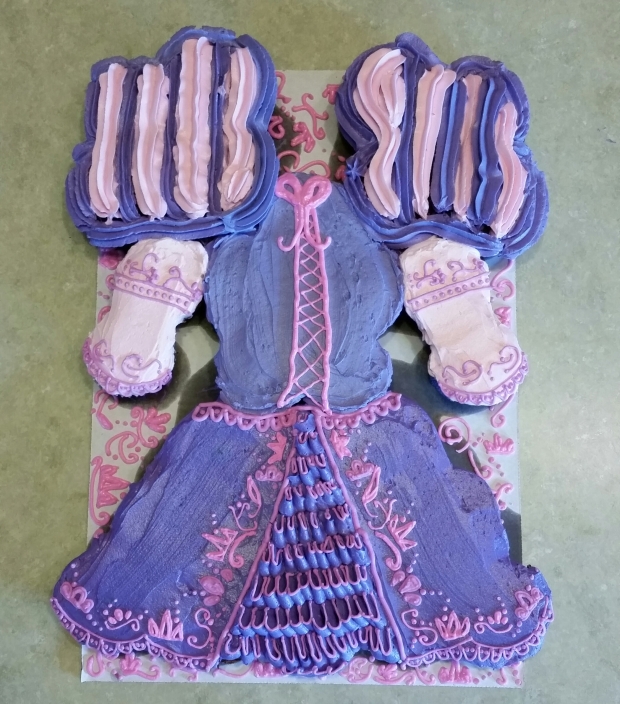
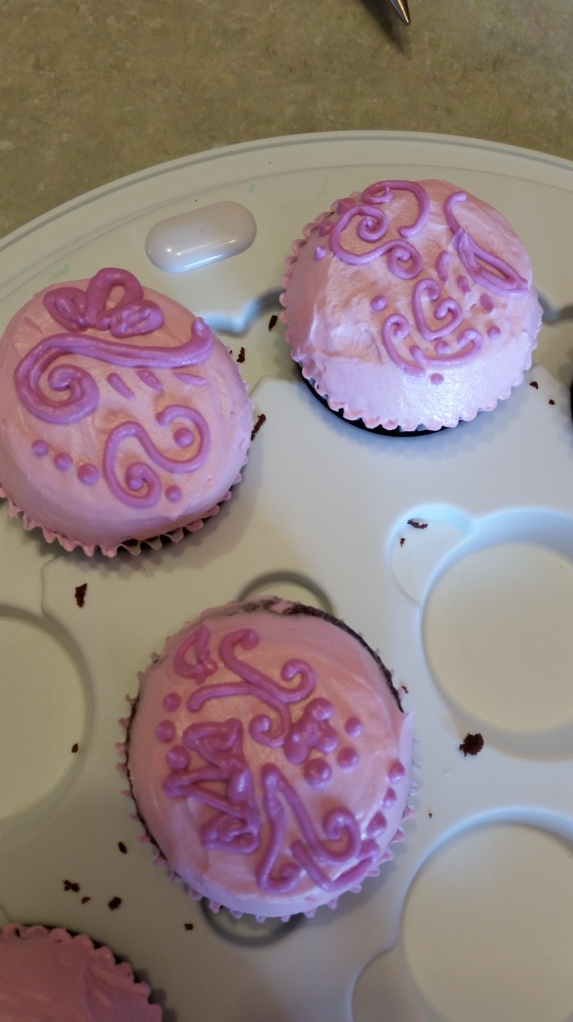
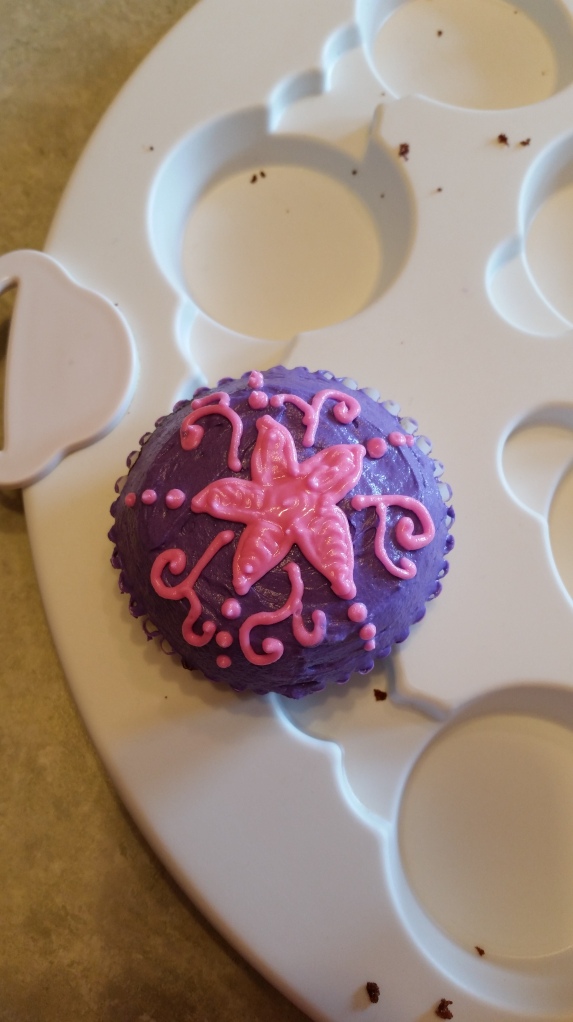
This week started with a birthday party for a friend’s daughter. She turned 4 and had a princess themed party, so of course I offered to do the cake as a gift. They wanted a cupcake cake that looked like Rapunzel’s dress. I had so much fun with this cake! They needed 4 dozen, so I used 2 dozen for the cupcake cake and decorated the other 2 dozen to match the Rapunzel “theme” of the cake.

wpid-20140928_133242-1.jpg

wpid-20140928_141642.jpg

wpid-20140928_142143.jpg

Of course I had to make things complicated and do the separate cupcakes in pink and purple. But I really got into it and allowed myself to get creative. When I asked Eowyn if the cake looked like Rapunzel’s dress, she said, “Um, a little bit.” The little perfectionist supervised the whole process, popping into the kitchen to make sure that I was using the right colors in the right spots. She’s going to make quite the artist one day…

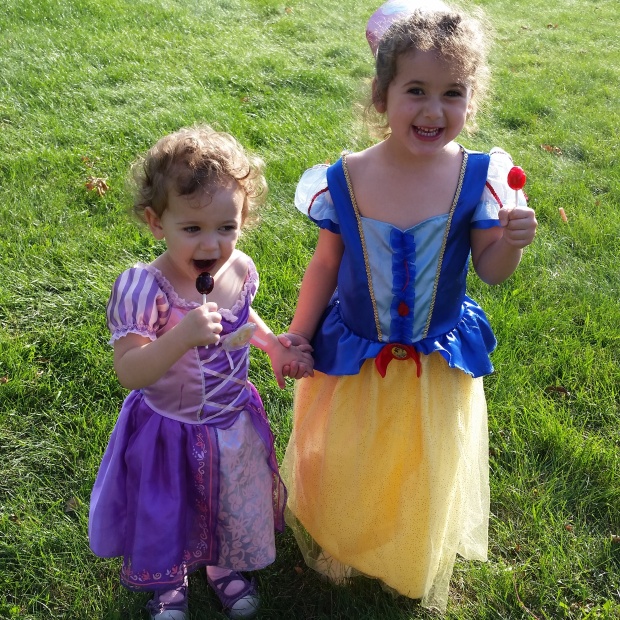
The girls dressed up in their princess dresses for the party and had a lot of fun! It was a shocking 80 degrees that weekend; probably the last time we’ll get anywhere near those temperatures until next summer.


wpid-img_20140928_202634.jpg

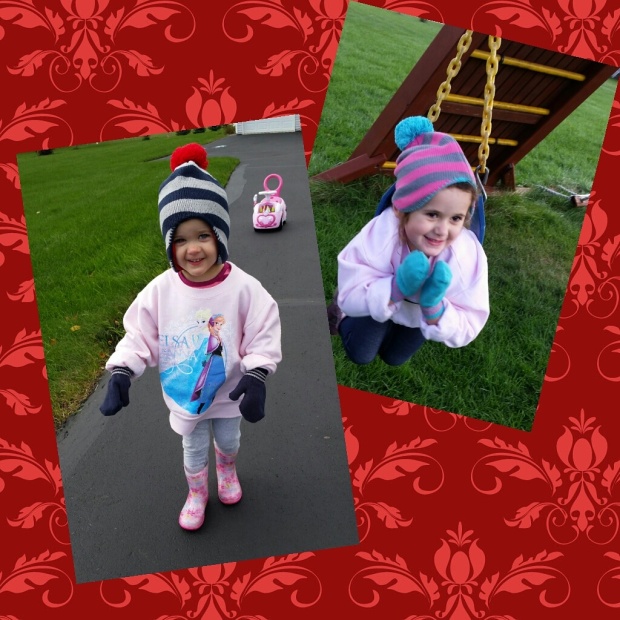
The rest of this week saw 3 cold, rainy days in a row, and then brisk Autumn weather. The first day that it stopped raining it was rather chilly out; around 40 degrees with the wind chill (and the wind was blowing pretty hard). But the girls and I were so stir crazy that we bundled up and still headed outside for some fresh, albeit cold, air. They didn’t seem to mind much.

wpid-img_20141004_140702.jpg

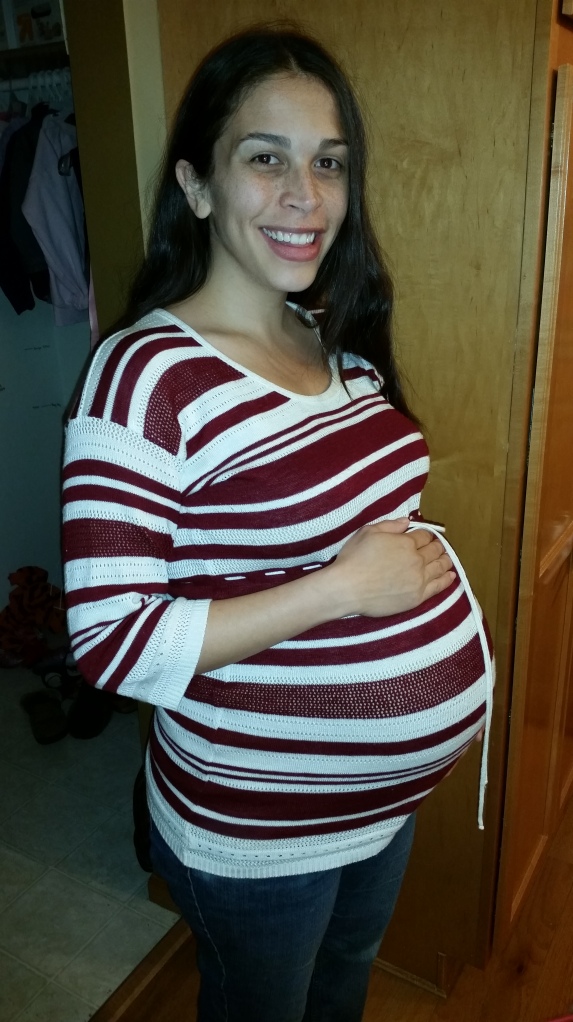
Thursday I had an OB appointment, so Tyler’s parents took the girls for the day. I’m 2 centimeters dilated, and at the time of the appointment, the baby was head down-ish but not engaged. Henderson Adipose has since moved, preferring to lay almost diagonally across my stomach, with his/her head facing my hip. I’ve actually felt fingers digging around that far corner of my uterus. It’s not painful, but is really uncomfortable. I’ve asked Henderson to stop, but like my other children, he/she is not listening… I am certainly not holding my breath about being dilated to 2 cm; my Timehop from 2 weeks ago was me posting on Facebook that I was dilated to 2-3 cm with Arya and that my midwife had said it would be any day now. Too bad Arya decided to be late by 3 days. My children have their own agendas; I’ve come to terms with that. This one will be late just like the other 2 were. Or, it will come early just to spite me since I’m expecting it to be late this time around. I did lose my mucus plug, so maybe it will be early. But probably it will be late.

After the appointment Tyler and I took advantage of the empty house and did some baby prepping. He got the bassinet and swing set up while I searched for bibs and receiving blankets. I found what I think are all of the bibs, but if Henderson is a boy, even those will have to be replaced–90% of them are pink. I only found half of the receiving blankets, but I’m pretty sure I know which box the others are in. I thought we would never use all 30 receiving blankets when we got them for our first baby shower, but it there’s one thing I’ve learned as a parent, it’s that you can never have too many of those things laying around! Babies puke. A lot. Receiving blankets are invaluable. Although we still have yet to retrieve it, we at least know where the bin of newborn clothes is–it’s in the most inaccessible corner of our ceiling storage in the garage. The only way we’re going to be able to get it down is if someone climbs on top of the rafter. That’s Tyler’s project for this coming Thursday. I then will really only have one more problem to sort out, which I just barely thought of last night–where to put my rocking chair for night time feedings. Our bedroom is small and already full of furniture; there really isn’t any space for it in there. We have a guest room, which will eventually be turned into the baby’s room, but my family is going to be occupying it from October 16-November 1. I can’t very well put it in there and wake them up every 2 hours when I need to feed the baby. I could go all the way downstairs and sit in the recliner, but I don’t trust myself to be able to safely navigate the stairs and baby gate while holding a newborn and basically sleep walking. I could bring the baby in bed with us for the time being, but co-sleeping kind of freaks me out when they’re so ity-bity (although I had Ary in bed with me within hours of her being born because she nursed for 8 hours straight that first night). We’ll figure something out. But it’s stuff like this that we would have had worked out weeks ago when I was pregnant with the girls. You really do grow more lax with each kid.

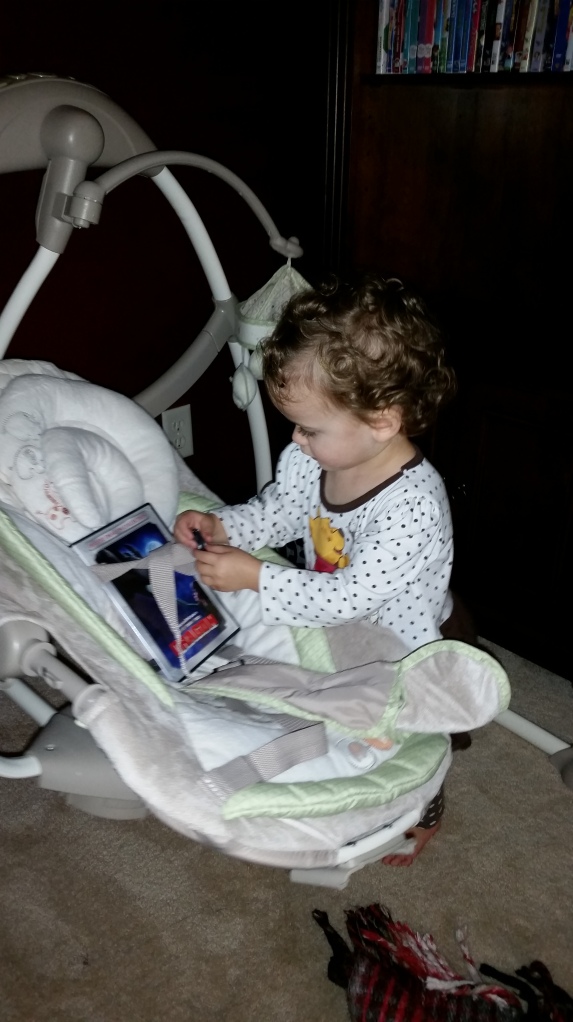
I was expecting it to be a nightmare to have the baby swing out, because I was anticipating that Ary would try to climb in it every chance she got. But to my great surprise, she has been really good with it. All she really does is put her baby dolls in it. Or, her movies (which she’s not supposed to touch):

wpid-20141002_212519.jpg

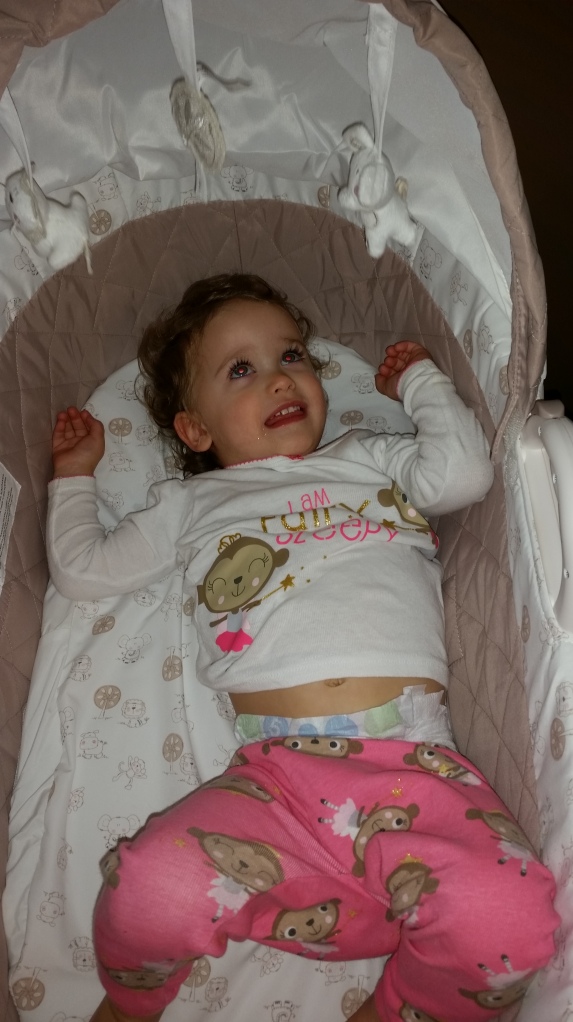
We threw her in the bassinet to mess with her, and she didn’t seem to like it much. Probably brought back memories of her crib days when she was a confined prisoner at bedtime, unable to escape at her own free will as she does now (oh how I miss the crib days!)

wpid-20141002_214427.jpg

I can’t believe how big this kid is getting. She’s going to be 2 on Wednesday, and I want to cry every time I think about it. They grow up too fast.


Baby Stats:

-Henderson is about 6 1/3 pounds and around 19 inches long, about the length of a bunch of swiss chard

-Babies aren’t considered ‘full term’ until 39 weeks, because baby needs these next 2 weeks to fully mature the brain and lungs


Dairy Free Moist Chocolate Cake

I went 18 years before ever having chocolate. I was born with my dairy allergy, and like most people, my parents thought that all chocolate had milk in it. It wasn’t until I was cast in a play my senior year of high school that someone told me about dark chocolate, which does not contain milk. My character was scripted to eat her sister’s box of chocolates on stage, taking a bite out of each one and then putting them back. I brought up in the first read through that that was going to be a problem because of my allergy, only to be met with the prop manager looking at me with a quizzical eye and saying, “But you can have dark chocolate, right?” That play not only opened the world of theatre to me (which is still my life and passion to this day), but also gave me the best thing this world has to offer: CHOCOLATE!

Ever since that fateful day, I have been on a mission to learn how to make all the chocolate desserts I had heard so much about. Chocolate cake, chocolate chip cookies, hot chocolate, brownies, truffles, chocolate covered strawberries, and ganache are all things that I have successfully made without using a lick of dairy. One of my goals in life is to find a way to make a dairy free version of every chocolate delicacy that exists.

Which brings me to my all time favorite chocolate cake recipe. It’s moist, but not so dense that you feel like you’re eating fudge (or what I would imagine eating fudge would be like, as I have not figured out a way to make it without milk yet). It has a rich, chocolately taste that is to die for. Similarly to my vanilla cake recipe, I completely failed at getting the Pinterest slice of beautifully frosted cake shot. When I was photographing my process for both of these recipes, I was doing it for a birthday party and I did most of the baking after the kids had gone to sleep. Time was definitely not on my side, and I was focused on getting it done so that I could get to bed. Once I finally got the dinosaur cake to the party, the last thing that I was thinking about was getting a picture of a slice of cake. I was just relieved to have made it there with the thing still in tact! So please forgive my inexperience in writing food blog posts; live and learn!

This recipe is from my Hershey’s Recipe Collection book that my mom got for me ages ago. I love this book; it’s full of wonderful chocolate recipes. If you’re a chocoholic, then I definitely recommend it!


Ingredients:

-2 cups of sugar

-2 eggs

-1 cup of almond milk

-1 teaspoon of vanilla extract

-1 3/4 cups of flour

-3/4 cup of cocoa powder

-1 1/2 teaspoons of baking powder

-1 1/2 teaspoons of baking soda

-1 teaspoon of salt

-1/2 cup of vegetable oil

-1 cup of boiling water


The one and only substitution to make this recipe dairy free was to swap almond milk for regular milk. Easy peasy. Of course, soy milk or coconut milk would work fine too.

First, preheat the oven to 350 degrees. Grease and flour your pan, or put liners in your cupcake pan. This recipe will make two dozen cupcakes, or two 8″ rounds, or one 12.8″ x 9.5″ sheet cake.

Cream together the eggs and SIFTED sugar (you must sift the sugar, otherwise you’re likely to get lumps). I am a big believer in scraping the sides of the bowl before adding in a new ingredient. If you skip this tedious step, you will end up will lumps of batter on the sides that never got mixed in properly. So, scrape the sides of the bowl. Every time. Or you will regret it.

Next, SIFT in the flour and mix. Scrape the sides of the bowl.

Set your mixer to ‘stir’ and slowly add the milk and the vanilla extract. Scrape the sides of the bowl.

Then you SIFT in the cocoa powder and mix well. While it’s mixing, throw in the baking powder, baking soda, and salt. Once it’s all mixed in, slow your mixer down to the ‘stir’ setting once more, and add the vegetable oil. Then bump it up to speed 2 until it’s mixed in. Scrape the sides of the bowl.

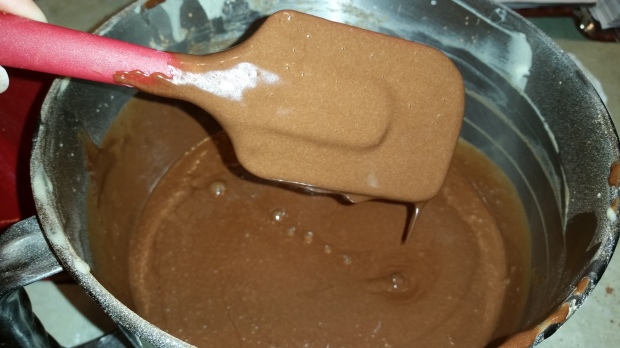
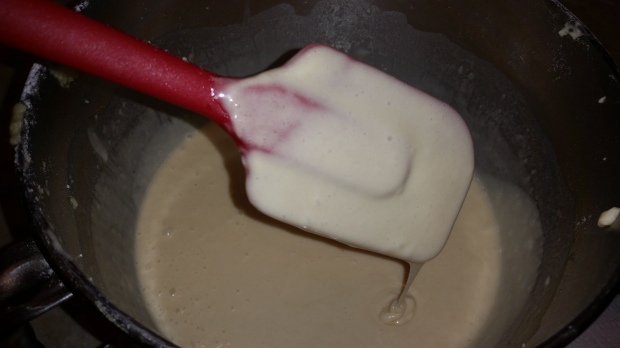
Return the batter to the ‘stir’ setting and SLOWLY add the boiling water. Trust me, splashes of boiling water to the face hurt badly; take your time pouring it in. Once all the water is mixed in, scrape the sides of your bowl one more time and mix in the lumps until your spatula comes out looking like this:

The batter will be very thin

The batter will be very thin

Bake for 20-35 minutes (depending on if you’re making a sheet cake or cupcakes), or until the middle is springy to the touch and a toothpick inserted into the center comes out clean.

I didn’t even get a crappy pan shot of this cake for you guys… Epic fail. The next time I make it, I promise to get the Pinterest picture and update this pathetic post. But for now, you will have to trust me when I say that this cake is the best chocolate cake in the world. Unless you like dry cake, in which case you’ll hate this because it is very moist. But seriously, who in their right mind has ever said, “I’m really in the mood for chocolate cake. But dry cake; non of the moist crap.”

Fresh-Prince-Of-Bell-Airs-Dissaproving-Stare-Reaction-Gif


My thoughts exactly Will Smith.

Dairy Free Moist Vanilla Cake

Like the complete sham that I am, I neglected to get the quintessential Pinterest picture of a single piece of beautifully frosted cake for this recipe. This is my very first recipe post and I’ve already screwed up. What ever will I do with myself?

Although my “finished” product picture is just a crappy pan shot, please trust me when I say that this cake is DELICIOUS. I refuse to produce dry cake, so white cake had been a challenge for me for awhile. Every recipe that I tried was dry, uninspiring, and sad. No one wants to eat sad cake; cake should make you feel happy. This cake makes people happy. It’s moist, fluffy, and delicate, but not so delicate that it can’t hold it’s own. I use this recipe for cupcakes all the time, and they stay put together as you peel the wrapper off. It also works well for layer cakes, standing proudly without any sag.

Like most of the recipes I use, this is not of my own invention. But let’s be honest here–very few people can actually take credit for “inventing” a recipe, and most of them probably died a very long time ago. We all borrow from one another, adding our own tweak here and there. Any cake recipe starts with the same foundation: flour, sugar, fat [butter, shortening, oil], and leavening ingredients [eggs, baking soda, baking powder]. I think it’s silly for anyone to get their panties in a bunch over someone else sharing THEIR recipe; no one has exclusive rights to any one recipe because IT’S BEEN DONE BEFORE. Many times. Before you were born even. But I digress. I will always give credit where credit is earned; I’m not here to try to take credit for anything that is not truly mine. However I refuse to feel guilty for “stealing” someone else’s recipes. If you don’t want people sharing your stuff, then don’t put it on the internet.

This recipe is from Allrecipes.com and can be found here.

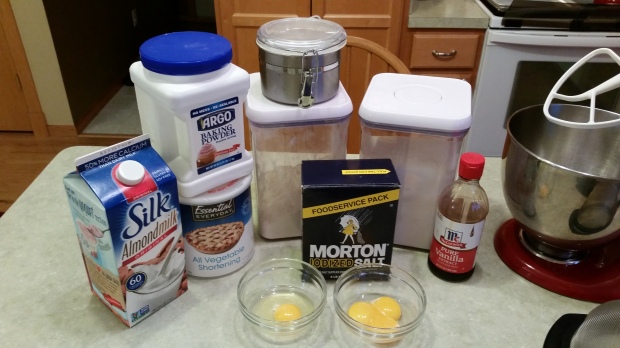
Ingredients you will need:

wpid-20140503_200147.jpg

-1/2 cup of vegetable shortening

-3 teaspoons of water

-2 cups of sugar

-3 egg yolks

-1 whole egg

-2 teaspoons of vanilla extract

-2 cups of flour

-1/2 cup of almond milk

-1/2 teaspoon of salt

-1 teaspoon of baking soda

-1 teaspoon of baking powder

-1 cup of boiling water

There was only one substitution I made to make this into a non-dairy cake: I swapped almond milk for buttermilk. Soy milk is a better substitution for buttermilk because you can “sour” it by adding distilled white vinegar or lemon juice to it. I usually add 4 teaspoons of either the vinegar or the lemon juice for every 1 cup of milk. So for this recipe, use 2 teaspoons. But, you cannot “sour” almond milk. It gets curdled and ruins the overall consistency of the cake. The reason I chose to use almond milk is because my youngest daughter used to have a soy intolerance. She seems to have grown out of it, but as she’s only 1, I’d rather be safe than sorry. The almond milk works fine as a substitute, but if you can use soured soy milk, do that instead.

First things first–preheat the oven to 350 degrees. If you are doing a cake, then grease and flour the pan; if you are doing cupcakes like me, put the liners in (this recipe will make 2 dozen cupcakes, or two 8″ rounds, or one 12.8″ x 9.5″ sheet cake).

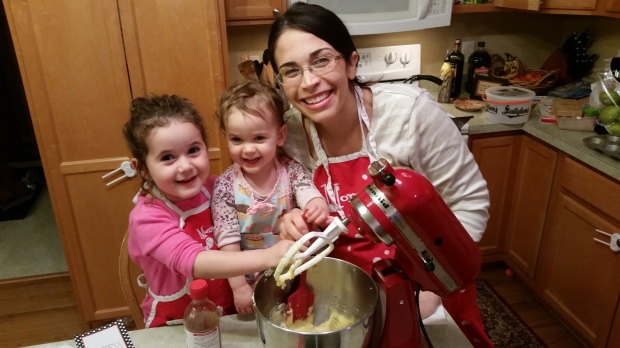
Then you’ll want to enlist the help of adorable tiny humans in aprons to be your assistants.

The sweetest thing

The sweetest thing

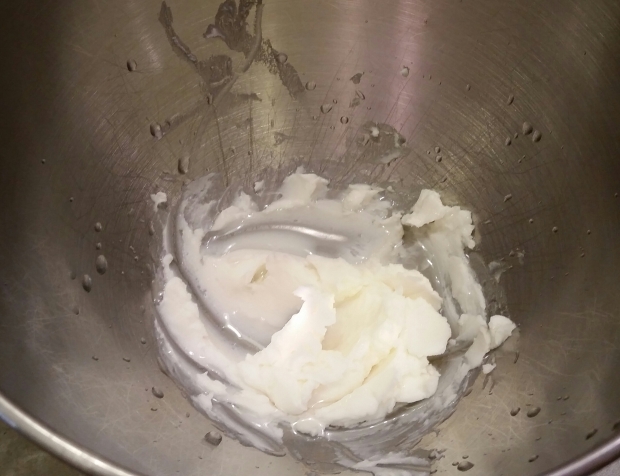
Now, in a large mixing bowl, cream the shortening with the water with the back of a spoon. They will not incorporate; you just want to soften the shortening. If you ever use a baking recipe that requires shortening, always soften it with water first. The ratio is 6 teaspoons of water for every 1 cup of shortening.

wpid-20140503_200342-1.jpg

Next, sift the sugar into the shortening/water mixture, and cream until fluffy (on my Kitchen Aid mixer, I start at the number 2 speed and work up to the number 4 speed for a minute or so). YOU MUST SIFT THE SUGAR. Unless you like lumps in your cake, in which case don’t bother with the sifting.

Also, the kids LOVE the sifting part

Also, the kids LOVE the sifting part

The next step is one that will repeat: scrape the sides of the bowl. To me, this is so important, because otherwise you end up with lumps of ingredients on the sides of your bowl that never got mixed in with the rest of the batter. So every time you add an ingredient you must scrape the bowl before adding the next thing. Yes it’s tedious and you’ll want to skip it every time, but trust me–it’s worth it.

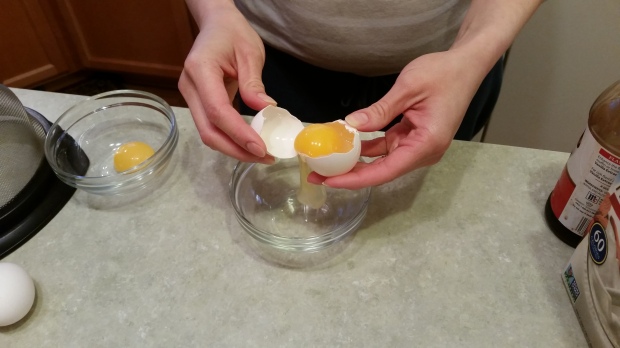
Now it’s time to add the eggs. If you don’t know how to separate eggs, here’s how I do it:

wpid-20140503_195925.jpg

Crack the egg, and gently move the yolk from one part of the shell to the other, allowing the egg white to fall into a bowl. Now the rule with separating eggs goes as such: it’s ok to get a bit of white in your yolk, but you can’t have any yolk in your whites. If you’re making something that requires egg whites, there absolutely cannot be even a spot of yolk in them. The whites will not whip up properly if there is. Egg yolks aren’t as picky; they’re ok if a bit of the white comes along for the ride.

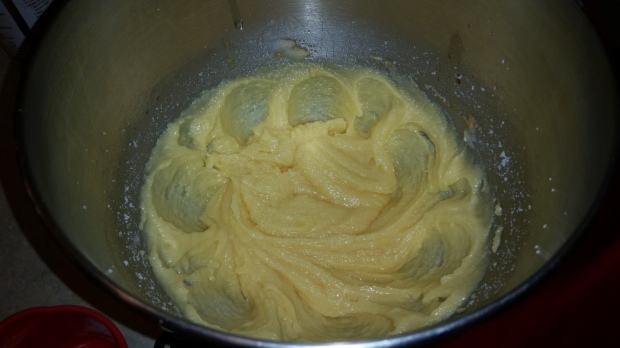
Add each egg yolk and the whole egg one at a time, beating well in between each one. The mixture will get fluffy, as such:

wpid-20140503_201831.jpg

Scrape the sides of the bowl, then add the vanilla extract and mix.

Sift the flour in, and mix until well incorporated. Scrape the sides of the bowl.

While the mixer is on the ‘stir’ setting, slowly pour the milk in. After all the milk has been added, scrape the sides of the bowl.

Add the salt, baking powder and baking soda, and mix. Then scrape the sides of the bowl.

Again, while the mixer is on ‘stir’, SLOWLY pour the boiling water in (please be careful; you don’t want to add it in too fast and get a splash of boiling water to the face). After all of the water has been added, scrape the sides of the bowl one last time and mix in any lumps so that when you lift your flat spatula, it looks like this:

The batter will be very thin

The batter will be very thin

Bake at 350 degrees in a greased pan for 20-30 minutes (depending on if you’re making cupcakes or a sheet cake). You’ll know that the cake is done when the middle is springy to the touch, and when a toothpick inserted into the middle comes out clean.

Trust me--they're delicious!

Trust me–they’re delicious!

Let the cake cool completely before frosting, and enjoy!


My Eggo is Prego: 16 Weeks

16 Weeks

16 Weeks


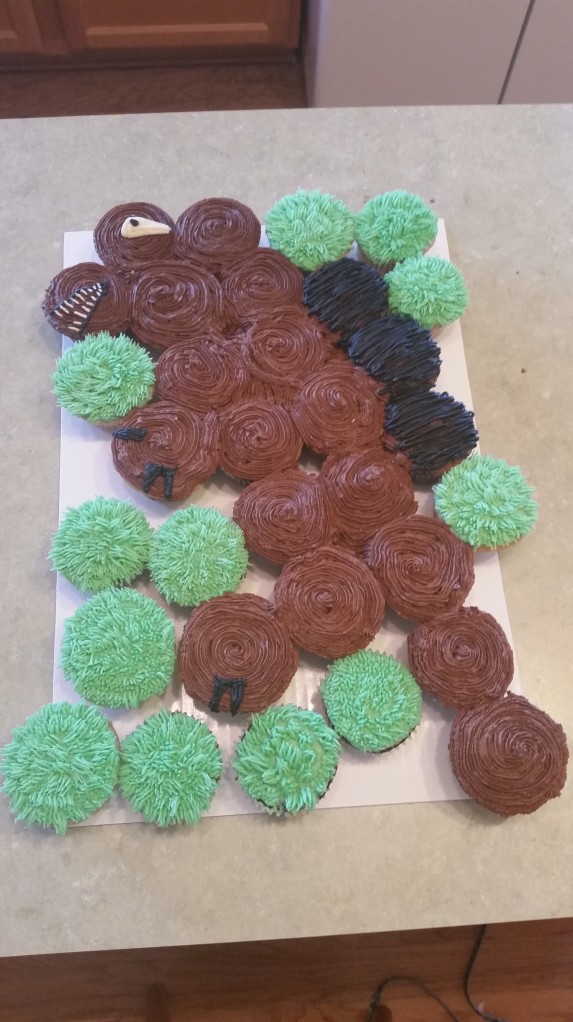
This week started off with a birthday party for one of Eowyn’s friends from dance class. We’ve become friends with the family, so the girls know each other from more than just dance. Cake decorating is a hobby of mine, so I offered to make the cake to help take some of the load off from the mom because I know first hand how much work goes into these kid parties. It was a dinosaur themed party, so I put together a dinosaur cupcake cake:

Dinosaur Cupcake Cake

Dinosaur Cupcake Cake


I photographed the whole process, so I’m planning on putting together a tutorial post on how I made it soon. Not gonna lie–I’m pretty proud of how this one turned out.

The party was fun, but Eowyn kind of had a hard time playing with the other kids. They didn’t really seem to want to play with her. The birthday girl and her sister, both of whom Eowyn has had many play dates with, were too busy playing with the other kids to include Eowyn. It was so heart breaking to watch our lovely little girl have such a hard time fitting in with the other kids. The mama bear part of me wanted to step in and tell those kids to include her, put I know that she has to learn how to socialize with her peers on her own. So I bit my lip, and watched the ever so painful process of my little girl learning a hard life lesson: sometimes, making friends isn’t easy. I used to be very shy when I was growing up, always feeling awkward in social situations with new people. Which made it so much worse for me to watch my baby girl go through the same thing. But, she is stronger than I was, for she never stopped trying to play with the other kids. And when they were off somewhere and she couldn’t find them, she didn’t pout for long. She just started playing on her own, or with her sister, or with Tyler and I. Although it was hard to watch her struggle, I was very proud of her for never giving up and finding ways to have fun regardless of how rude the other kids were being towards her.

The rest of my week kind of got consumed by sickness. Tyler and I came down with a nasty stomach bug Wednesday night, which hit us full force on Thursday. I got it worse than him, and spent the entire day in and out of the bathroom. Thankfully the girls did not get it, but that meant trying to take care of two energetic girls while being sick as a dog. Speaking of dogs, we also had to deal with our Aussie-Shepherd freaking out all day because of the never ending thunder storms. It was a very long day. Tyler’s mom risked infecting herself by coming to our rescue half way through the day, bringing medicine, gatorade, and soup with her. We were finally able to rest without the girls jumping on us, and she even stayed long enough to put them to bed and do our dishes for us. Such a God send. By the end of the day, I weighed myself out of curiosity and was shocked to see that I had lost 9 pounds! I didn’t even know it was possible to lose 9 pounds in a day. I think that’s the sickest I’ve ever been in my life. It was only by the grace of God that I was able to get through it.

The sickness only lasted a day, but I woke up on Friday feeling totally drained (I wonder why). I was having heart palpitations and was really light headed, so I went to the ER. I figured I needed IV fluids, but after some tests, they told me that I had done a really good job of drinking water despite being so sick because I wasn’t that dehydrated. I was just exhausted. My body needed rest and more fluids, but no need for the IV stuff. Considering I have a thing about needles, I was happy to go home un-poked. Just to be safe, they did an ultrasound of Baby. Baby was fine; he/she was moving around so much that it was difficult for the doctor to get a read on the heartbeat. The two times that I’ve had an ultrasound, the first thing that both doctors commented on was how much Baby was moving; as if it’s a tad abnormal to see a baby move so much so early. Looks like we’ve got a super active baby on the way… Which is great, because you know, our first two kids are so boring and low energy…

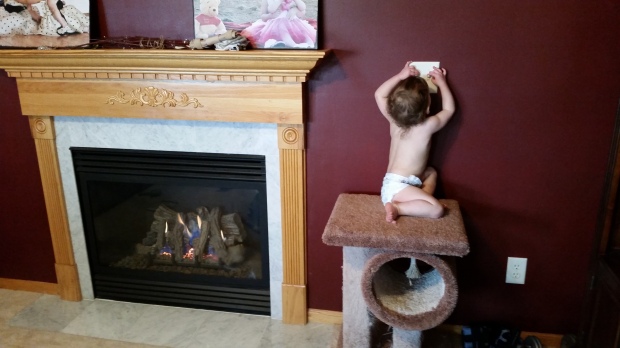
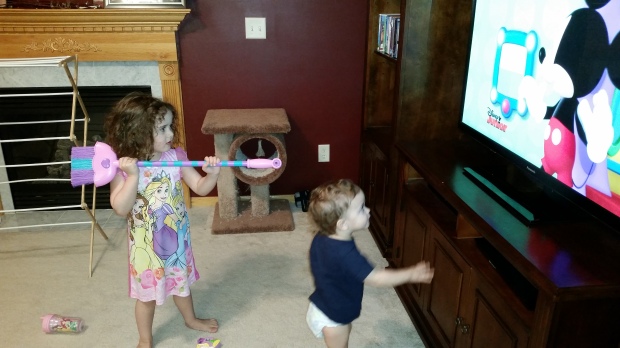
Ary on the cat tree, turning on the fireplace on the day that I was dying.

Ary on the cat tree, turning on the fireplace on the day that I was dying.


When "Mickey Mouse Clubhouse" came on this evening, Eowyn was up in arms (literally; hence the broomstick), yelling, "Seize Mickey! Seize him! He's a thief! We have to kill him!" Don't ask for an explanation, for I will never have one.

When “Mickey Mouse Clubhouse” came on this evening, Eowyn was up in arms (literally; hence the broomstick), yelling, “Seize Mickey! Seize him! He’s a thief! We have to kill him!” Don’t ask for an explanation, for I will never have one.


I think New Baby will fit in just fine in this house.

As for me, I’m going to go enjoy the quiet of this Saturday night by reading my devotional, and rest up so that I can (hopefully) have my energy back for Mother’s Day tomorrow.

Oh! Baby Stats; I almost forgot:

-Baby is the size of an avocado; 4 1/2 inches long head to rump, and weighing 3 1/2 ounces

-The legs are much more developed

-The head is much more erect

-The eyes are moving closer to their final position (they start at the side of the head)

-The ears are also close to their final position (they start at the neck)

-The patterning of the scalp has started, although there isn’t any recognizable hair yet

-Toenails have started growing


Happy Sunday, everyone! And to all my fellow mamas out there: Happy Mother’s Day!