allergy free

Dairy Free Chocolate Maple Bacon Cupcakes

wpid-20150624_195908.jpg

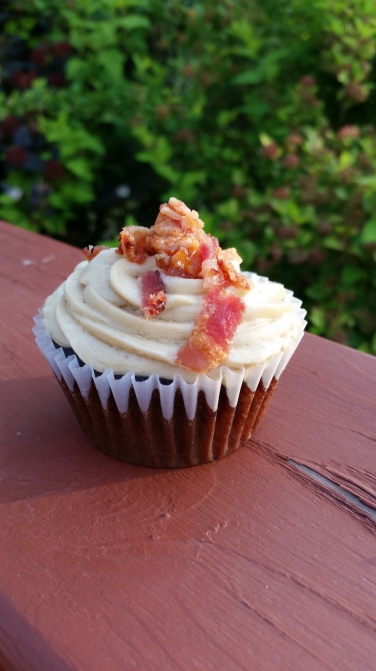
Yes, you read that correctly–I put chocolate, maple and bacon together. In a cupcake. Win, win, win, win!

I got the idea from this bacon cupcake but honestly didn’t really follow that recipe at all. For starters, that cake recipe called for sour cream, which is really impossible to substitute for when one is trying to make it dairy free. But the part that really turned me off of that recipe was that she put chopped up bacon inside the batter. I do not like soft bacon, and I knew that there was no way for the bacon to stay crispy after being baked inside a cupcake. So I took this marvelous idea for a bacon cupcake and made it my own.

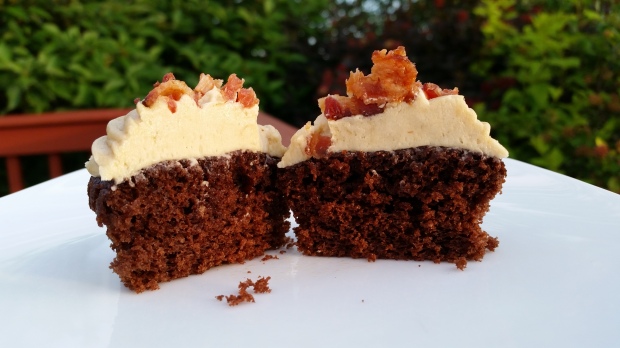
The cake recipe is from one of my favorite dessert cookbooks: Hershey’s Recipe Collection. I’ve had this since my single days, and I love it! Since I knew that the bacon and maple frosting was going to be pretty heavy, I wanted to go with a light and fluffy cake instead of dense and moist like I would usually pick. Hershey’s “1st Birthday Cupcakes” were exactly what I was looking for. Light, soft, fluffy, chocolately goodness, but not dry. There’s not as much cocoa powder in this recipe as compared to most other chocolate cake recipes, putting it more in the family of red velvet, but without all the food coloring. It’s perfect if you want a chocolate cake that still has all the glory that is chocolate without weighing you down.

wpid-20150624_200317.jpg

A note before I dive into the recipe: it calls for buttermilk, which can normally be substituted with a regular milk that is “soured” by distilled white vinegar. If you decide to use soy milk (or regular cow milk if you don’t have any allergies to worry about), then you can add the vinegar to the milk and then add that mixture to the batter. However, if you are using almond milk like I did, do NOT add the vinegar directly to the milk. It causes it to separate and when you add it to the batter, it doesn’t incorporate well. You have to add the milk and vinegar to the batter separately. Moreover, if you are a dairy eater and are using buttermilk, then omit the vinegar completely.

So here’s the recipe for these little lovelies (it will make a little over 2 dozen cupcakes).

Ingredients for Chocolate Cupcake:

  • 1/2 cup of all vegetable shortening
  • 1 1/2 cups of sifted sugar
  • 2 eggs
  • 1 1/2 cups of sifted flour
  • 1/2 cup of sifted cocoa powder
  • 1 teaspoon of baking soda
  • 1 teaspoon of salt
  • 1 teaspoon of baking powder
  • 1 1/2 cups of almond milk
  • 4 1/2 teaspoons of distilled white vinegar
  • 1 teaspoon of vanilla extract

Directions:

  • Pour the almond milk into a glass measuring cup and mix in the baking powder. Baking powder is liquid reactive, so this will allow it to start activating before you add it into the batter, and give the batter a fluffier texture.
  • Cream the shortening with 1/2 cup of sifted sugar with the flat beater attachment until smooth.
  • Add the eggs, mixing well after each one.
  • Add the remaining sugar.
  • Add the baking soda, salt, and vanilla extract, allowing them to mix in.
  • Next, add the flour and cocoa powder. As you start the mixer, slowly add the almond milk so that the batter stays moist and doesn’t get crumbly.
  • Once everything is incorporated nicely, add in the vinegar.
  • Pour into cupcake pans and bake at 350 degrees for 20 minutes, or until it springs back when touched.

Now that the cupcakes are baked, let’s move on to the maple frosting.

As is the case with all of my frosting recipes, I did use a stick of margarine, which is not 100% dairy free. It contains the milk derivative ‘whey’. So if you have an allergy that cannot tolerate whey, you can use all vegetable shortening instead. Trust me, it will still be just as delicious!

Ingredients for Maple Frosting:

  • 1 stick of room temperature margarine
  • 1 cup of all vegetable shortening (or 1 1/2 if using all shortening)
  • 1/3 cup + 2 tablespoons of maple syrup (Please buy the real deal; Aunt Jemima ain’t gonna cut it this time! Pure maple syrup is the only way to do these babies justice.)
  • 4 cups of sifted powdered sugar
  • 1/2 – 1 teaspoon of sea salt
  • 1 teaspoon of vanilla extract

Directions:

  • I used to roll my eyes whenever I read “room temperature” anything in baking recipes, but I am noticing that it really makes a huge difference to use room temperature margarine where frosting is concerned. It’s just too hard to get it to smooth out nicely if it’s too cold. What’s that? You don’t have the patience or planning abilities to remember to set a stick of margarine out 2 hours before you’re ready to start baking? Me neither! Here’s a nice hack for you: put the stick of margarine in a microwave safe bowl, cover it with a paper towel to contain potential splatters, and pop it in the microwave for 10-15 seconds. And just like that, you have room temperature margarine! Just be careful to not over heat it, which can happen quickly in the microwave. If it gets melty then you’ll have to trash it and try again. Runny margarine will completely ruin the texture of the frosting.
  • Once the margarine is room temperature, cream it using the flat beater attachment on the ‘2’ setting until it’s smooth.
  • Add the vegetable shortening and cream it on the ‘2’ setting, again until smooth. This may take a bit, and you may be tempted to up the speed, but don’t do it! Incorporating too much air is the death of smooth frosting.
  • Add in the first 2 cups of sifted powdered sugar 1 cup at a time, allowing it to completely mix in before adding more.
  • After the second cup of powdered sugar, add in the maple syrup and vanilla extract.
  • Add in the remaining 2 cups of powdered sugar, again 1 cup at a time. (I know this seems like a lot of powdered sugar, but the salty bacon will off set it. Plus the maple syrup makes it pretty soft; it really needs the extra powdered sugar to help it thicken up.)
  • Lastly, add in the sea salt. I feel that this part is all a matter of preference, so start with 1/2 teaspoon and taste it before adding in the other 1/2. I ended up going with a full teaspoon, but honestly once I topped it with bacon, it was almost a tad too salty. So take the sodium in the bacon into consideration too. Don’t get me wrong, the cupcakes were still awesome. I just realize that it might be a bit much for some people.

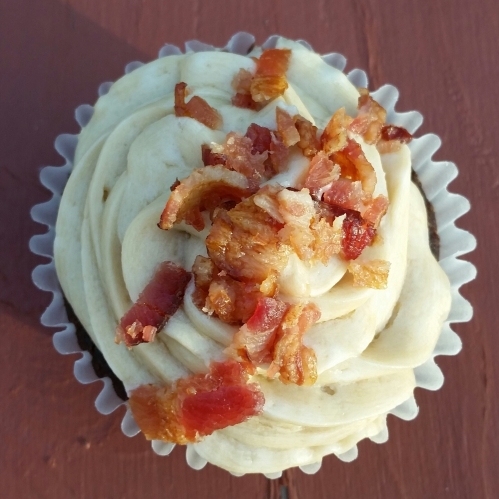
Then of course, there’s the most important component–the BACON! I used a total of 8 pieces of bacon. Personally, I like to cook my bacon in the oven because then there isn’t a bunch of grease splatters to clean up. 375 degrees for 20 minutes on a foil lined cookie sheet (it has to be a cookie sheet with a lip so the grease doesn’t spill out). When they’re done, pat the grease off with some paper towels. Then chop them up into little crunchy bits.

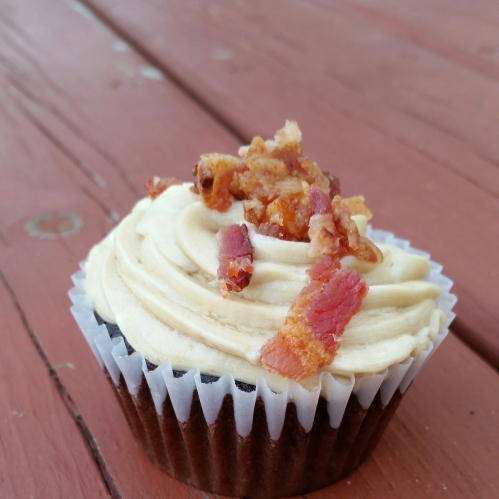
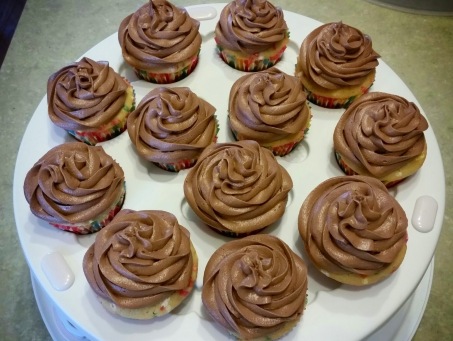
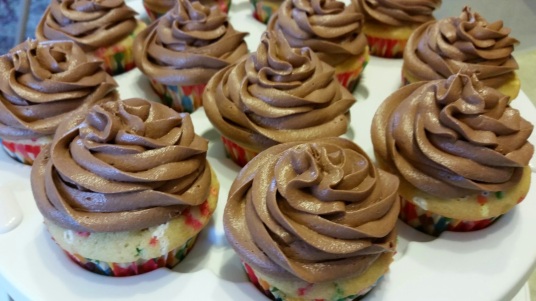
I chose to swirl the maple frosting on with my large open star tip, but use whatever you fancy. The frosting really just serves as the pillow to hold up the real prize of this cupcake–the bacon.

wpid-20150624_195915-1.jpg

It’s definitely more of a savory cupcake because it really isn’t very sweet. The chocolate and maple flavors are perfect side kicks to help highlight the salty, smokey, awesomeness that is bacon. I made them for Father’s Day, because they just seemed like a ‘manly’ cupcake. I mean, what guy doesn’t love bacon, right? Now I won’t lie to you–not everyone was crazy about them. They’re definitely a unique flavor that not everyone will be keen on. But the majority of people at the celebration really enjoyed them.

Bottom line–if you love bacon, you need to try these, because I don’t believe you will be disappointed!

wpid-20150624_200036-1.jpg

Happy Baking, Everyone!
The Best Dairy Free Chocolate Frosting

wpid-wp-1421600809992.jpegLast week I shared my favorite dairy free vanilla frosting with you, and today I am going to share it’s chocolate counterpart.

I know that dairy eaters would read the title of this post and scrunch their noses at chocolate that doesn’t have milk as if it were a mutant bastard child. But trust me–they would never know that this frosting didn’t have their precious dairy in it! It is not bitter at all, but is smooth and sweet, while still packing a full chocolate flavor.

I used it for my husband’s birthday cake this year, and he declared it his favorite frosting of all time. Considering that he’s a dairy loving Midwestern (from Wisconsin, no less), this was a very high compliment!

Try it out–you will not be disappointed!

A quick note: stick margarine is not 100% dairy free. It contains a milk derivative called ‘whey’. If you cannot tolerate whey, then use all vegetable shortening. The result will be just as delicious.

Ingredients:

  • 2 containers of marshmallow fluff (also called marshmallow creme)
  • 1 stick of margarine
  • 1 cup of vegetable shortening (or 1 1/2 cups, if you are omitting the margarine)
  • 1/2 cup of sifted cocoa powder
  • 2 1/2 cups of sifted powdered sugar
  • 1 teaspoon of vanilla extract
  • 2 splashes of vanilla almond milk

Directions:

  • Mix marshmallow fluff until smooth with the flat beater attachment on the ‘stir’ speed setting.(*HELPFUL TIP* Run a rubber spatula under hot water before scooping out the marshmallow fluff to make it come out super easy. It makes a world of difference getting all that sticky deliciousness out.)
  • Add half a margarine stick and mix on the ‘2’ speed setting until smooth. Then add the other half and mix until smooth.
  • Add the shortening half a cup at a time, allowing it to smooth out completely before adding more.
  • Add the SIFTED cocoa powder, again allowing it to smooth out completely.
  • Add 1 cup of SIFTED powdered sugar and mix until smooth. Add the rest of the powdered sugar 1/2 cup at a time, allowing the frosting to completely smooth out each time before adding more.
  • Add the vanilla extract.
  • If it seems a little thick, add a splash of almond milk. I usually end up adding 2 splashes, but this again is all a matter of preference.

The trick to this frosting is to not over whip it. If it gets too much air in it, then you will see holes in it when you are covering your cake. Do not put your mixer any higher than the ‘2’ speed setting. It will take longer, but be worth it when it comes out nice and smooth!

This recipe will yield enough frosting to cover two 8″ or 9″ round cakes, a 12″ x 9″ rectangle cake, or two dozen cupcakes. It will keep at room temperature for a couple days and for a couple of weeks in the fridge. It also freezes really well if you double wrap it tightly in plastic wrap and then store it inside a freezer Ziploc bag. I can’t say how long it will last in the freezer as I’ve only kept mine in there for 3 months, but I would think that as long as it’s not freezer burnt that it would be fine. If you freeze it, allow it to come to room temperature and mix it in your mixer on the ‘stir’ speed setting for a minute or two until it’s smooth.

Enjoy!

wpid-wp-1421600810109.jpeg

The Best Dairy Free Vanilla Frosting

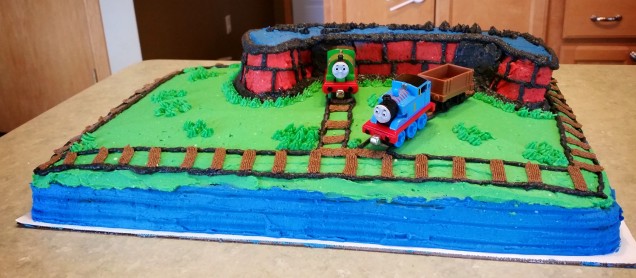
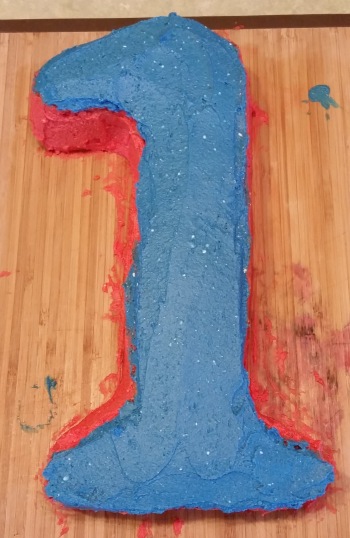
It’s taken me quite a long time to craft the perfect dairy free vanilla frosting. Using only sticks of margarine gives inconsistent results. I’ve managed to get it to a nice consistency before, as seen on my Thomas the Train cake:

image

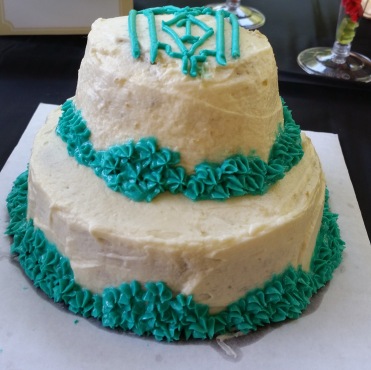
But I also had major issues with it turning out way too soft, like with my art deco smash cake:

image

With both cakes, I used the exact same ingredients. Yet, as you can see, got completely different results.

I almost always have issues coloring all-margarine frosting too. More times than not, I would be left with white specks where the color didn’t quite stick.

image

However, I think this was more of a mixing problem. I have found that mixing SLOWLY is the key to a good frosting. And you MUST soften the margarine before adding any powdered sugar. I’ve never been known for my patience, so this took me many years to figure out.

The smoothest frosting comes from using vegetable shortening. It still tastes good, but the margarine adds a depth of rich flavor that the shortening lacks. So, I wasn’t ready to give up on using margarine all together. I began experimenting with mixing margarine and shortening, and found that the best mix was 1 stick of margarine and 2 cups of shortening. The frosting was smooth, the color mixed through well, and the flavor was on the mark.

image

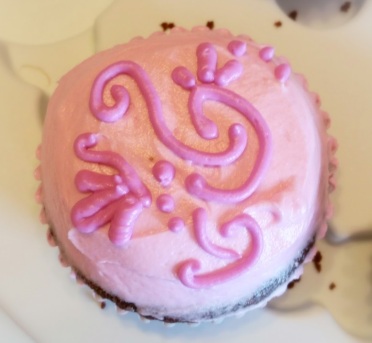
The piped design is made of royal icing, but you can see how smooth the “buttercream” is underneath

Then I stumbled on this recipe for ‘Strawberry Dream Frosting’ on Pinterest. She uses marshmallow fluff with butter to create a really yummy flavor. I tried it for my daughter’s 2nd birthday, because she LOVES marshmallows. I modified the recipe a bit, using 1 stick of margarine and 1 cup of shortening, and using 3 cups of powdered sugar. Why more powdered sugar, you ask? Because frankly, I like my frosting sweet. And it wasn’t thick enough in my opinion with just 1/2 cup.

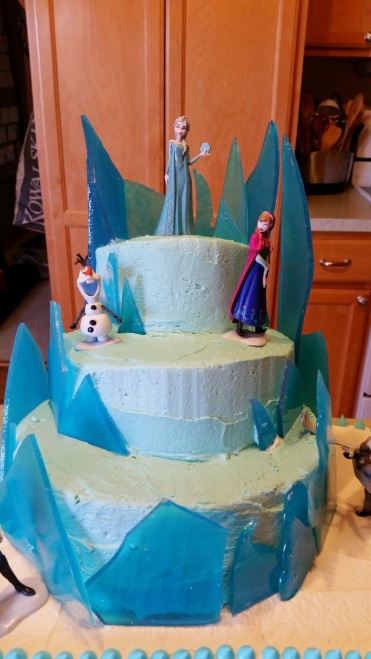
The result is a delicious frosting that pipes easily and can be used for frosting layer cakes as well. However, the marshmallow fluff doesn’t give a super smooth finish. As you can see in this Frozen cake, there are lots of air bubbles. But a lot of that could have been avoided if I would have kept my mixer at the speed ‘2’ setting.

image

So if you’re looking for super smooth, this isn’t the recipe for you. But if you don’t mind a more “home grown” look, so to speak, you should try this recipe. It’s really delicious!

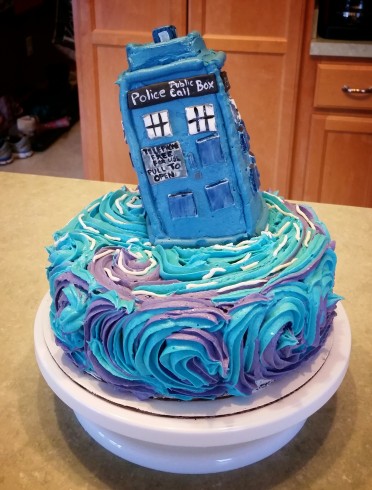
I can say that it pipes really well. I used this recipe for both the Tardis and the time vortex swirls on my Doctor Who cake:

image

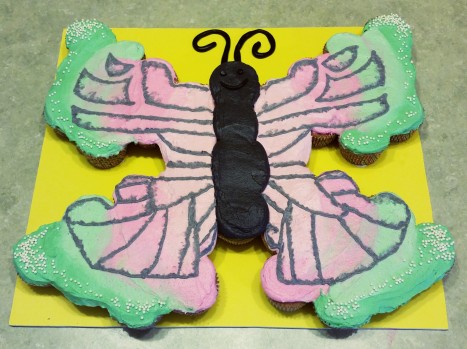
I also used it for this butterfly cupcake cake:

20150613_091032

I mixed it low and slow that time and, as you can see, got a much smoother result.

Let me state now that sticks of margarine are not 100% dairy free; they contain a milk derivative called ‘whey’. I would not suggest using tub margarine because it’s too soft. If your allergy is bad enough that you can’t tolerate whey, then simply use all shortening. I’ve successfully used 100% shortening with this recipe and gotten just as great results.

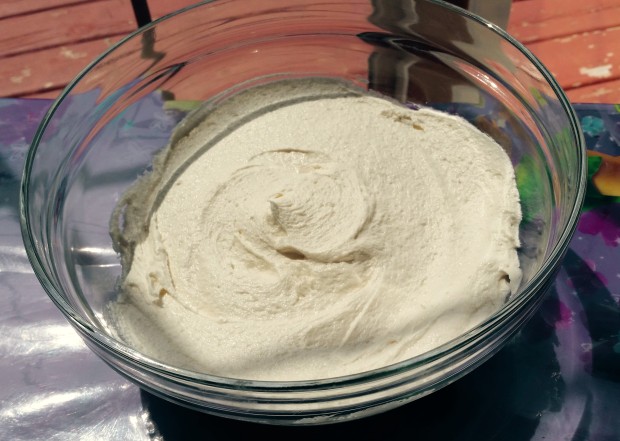
So here it is, my perfect vanilla frosting:

  • 2 containers of marshmallow fluff (also called marshmallow creme)
  • 1 stick of margarine
  • 1 cup of vegetable shortening (or 1 1/2 cups, if you are omitting the margarine)
  • 3 cups of sifted powdered sugar
  • Vanilla Extract
  • 2 splashes of vanilla almond milk

Directions:

  • Mix marshmallow fluff until smooth with the flat beater attachment on the ‘stir’ speed setting.(*HELPFUL TIP* Run a rubber spatula under hot water before scooping out the marshmallow fluff to make it come out super easy. This is written on the jar in the tiniest print imaginable, so I just barely learned this tip after months of making this stuff. It makes a world of difference getting all that sticky deliciousness out.)
  • Add half a margarine stick and mix on the ‘2’ speed setting until smooth. Then add the other half and mix until smooth.
  • Add the shortening half a cup at a time, allowing it to smooth out completely before adding more.
  • Add 1 cup of SIFTED powdered sugar and mix until smooth. Add the rest of the powdered sugar 1 cup at a time. If you feel you’ve reached a consistency and flavor that you like before adding all 3 cups, then don’t feel the need to add more. It’s all a matter of preference.
  • Add the vanilla extract (or whatever flavor extract you want). I don’t measure when I add extract. I just add it a bit at a time until it tastes right. Again, it’s all about preference.
  • If it seems a little thick, add a splash of almond milk. I usually end up adding 2 splashes, but this again is all a matter of preference.

The trick to this frosting is to not over whip it. If it gets too much air in it, then you will get holes as seen in the Frozen cake above. Do not put your mixer any higher than the ‘2’ speed setting. It will take longer, but be worth it when it comes out soft and smooth!

This recipe will yield enough frosting to cover two 8″ or 9″ round cakes, a 12″ x 9″ rectangle cake, or two dozen cupcakes. It will keep at room temperature for a couple days and for a couple of weeks in the fridge. It also freezes really well if you double wrap it tightly in plastic wrap and then store it inside a freezer Ziploc bag. If you freeze it, allow it to come to room temperature and mix it in your mixer on the ‘stir’ speed setting for a minute or two until it’s smooth.

20150610_145823


I hope you enjoy this delicious frosting as much as I do!

Salted Caramel Peppermint Cookie Dough Christmas Bars (Dairy Free!)

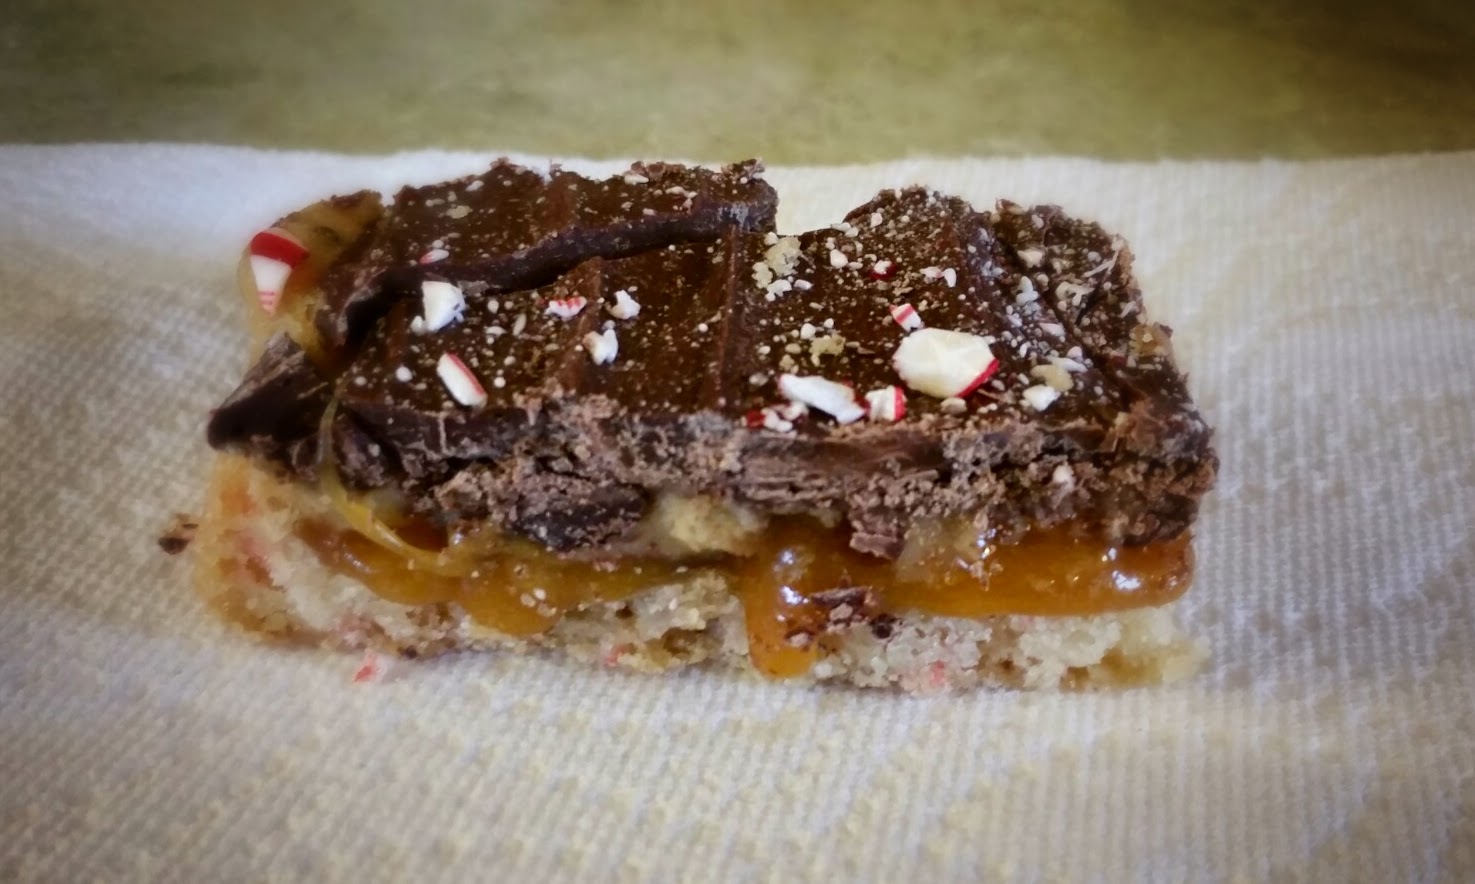
image

This recipe was born from me tweaking this salted caramel cookie dough billionaire bar. I first tried these billionaire bars over summer. My mother-in-law had made some after finding the recipe on Facebook, and was sure that it would be impossible to make a dairy free version. My response? Challenge accepted! It was an easy conversion, really; I just used a sugar cookie dough that was dairy free (Pillsbury), made my own caramel using margarine instead of butter, replaced the butter with margarine in her chocolate chip cookie dough recipe, and used dark chocolate instead of milk.

Pillsbury is selling peppermint sugar cookie dough that has actual crushed up candy canes inside the dough. I LOVE candy canes, so I was all over it! It got me thinking about making a Christmas version of these billionaire bars, and I came up with these delicious salted caramel peppermint cookie dough bars. They are perfection: rich caramel and dark chocolate, yummy cookie dough, icy blasts of peppermint, and a bit of salt to cut through the richness and round off the sweet. I personally think these would make a fantastic gift, so I thought I’d share the recipe, just in time for Christmas.

These dessert bars have 4 layers:

-Peppermint Cookie
-Salted Caramel
-Chocolate Chip Cookie Dough
-Dark Chocolate, sprinkled with sea salt and crushed candy canes

The first thing you will need to do is work on the peppermint cookie layer. You will need to line a 12×9 pan with parchment paper; that way it will be easy to pop out once the whole thing is set (make sure that the parchment paper goes up the sides). Then take the Pillsbury peppermint cookie dough and press it into the pan, creating one even layer. Bake according to the package instructions. Once baked through and browned, allow to cool completely.

While the cookie layer is baking, get started on your caramel. I use this recipe for salted caramel that I found on Pinterest. To make a dairy free version, I swapped margarine for the butter, and almond milk for the heavy cream. Obviously, almond milk has a much thinner consistency than heavy cream, so whenever you are substituting for heavy cream, you must be conscious of this. Instead of the 1/2 cup used in the recipe, I only used 2 tablespoons of almond milk. It resulted in a thicker consistency caramel, which I prefer for these bars. You can add one more tablespoon if you want a thinner, more “saucey” caramel. But be aware that you won’t know the true consistency of the caramel until it cools down to room temperature.

Once the peppermint cookie layer is completely cooled, spread the salted caramel evenly over it. I found it easier to spread when it was warmed up, so if your caramel is already at room temperature by the time the cookie layer is cooled, I suggest warming the caramel back up in the microwave. It warms up quickly so start it off with 20 seconds and do 10 second intervals after that until it’s thin enough to pour.

Next, you need to make the chocolate chip cookie dough. I used the recipe from the billionaire bar link above, swapping margarine for the butter to make it dairy free. I chose to completely omit the heavy cream because I don’t feel that it needs the moisture. Of course, I used dark chocolate chips instead of milk chocolate. Once that’s mixed up, gently spread it over the caramel. This part needs a delicate touch because the dough likes to stick to the rubber spatula and it’s easy for the caramel to push it’s way through the dough. Try to get it as evenly spread as you can.

On to the last layer! Melt 1 1/2 cups of dark chocolate chips. I like using a microwave because I find it’s too hard to control the temperature in a double boiler. To do it in the microwave, put the bowl of chocolate chips in for 20 seconds. Stir, and put in for 10 seconds. Continue stirring and heating in 10 second intervals until the chocolate is melted and smooth. Then pour it over the cookie dough and gently spread with a rubber spatula until it’s even. Sprinkle with a tiny bit of sea salt and crushed candy canes and you’re done! Let it firm up in the fridge for an hour and you’ve got yourself a delightful Christmas treat that is sure to make anyone happy.

Dairy Free Moist Chocolate Cake

I went 18 years before ever having chocolate. I was born with my dairy allergy, and like most people, my parents thought that all chocolate had milk in it. It wasn’t until I was cast in a play my senior year of high school that someone told me about dark chocolate, which does not contain milk. My character was scripted to eat her sister’s box of chocolates on stage, taking a bite out of each one and then putting them back. I brought up in the first read through that that was going to be a problem because of my allergy, only to be met with the prop manager looking at me with a quizzical eye and saying, “But you can have dark chocolate, right?” That play not only opened the world of theatre to me (which is still my life and passion to this day), but also gave me the best thing this world has to offer: CHOCOLATE!

Ever since that fateful day, I have been on a mission to learn how to make all the chocolate desserts I had heard so much about. Chocolate cake, chocolate chip cookies, hot chocolate, brownies, truffles, chocolate covered strawberries, and ganache are all things that I have successfully made without using a lick of dairy. One of my goals in life is to find a way to make a dairy free version of every chocolate delicacy that exists.

Which brings me to my all time favorite chocolate cake recipe. It’s moist, but not so dense that you feel like you’re eating fudge (or what I would imagine eating fudge would be like, as I have not figured out a way to make it without milk yet). It has a rich, chocolately taste that is to die for. Similarly to my vanilla cake recipe, I completely failed at getting the Pinterest slice of beautifully frosted cake shot. When I was photographing my process for both of these recipes, I was doing it for a birthday party and I did most of the baking after the kids had gone to sleep. Time was definitely not on my side, and I was focused on getting it done so that I could get to bed. Once I finally got the dinosaur cake to the party, the last thing that I was thinking about was getting a picture of a slice of cake. I was just relieved to have made it there with the thing still in tact! So please forgive my inexperience in writing food blog posts; live and learn!

This recipe is from my Hershey’s Recipe Collection book that my mom got for me ages ago. I love this book; it’s full of wonderful chocolate recipes. If you’re a chocoholic, then I definitely recommend it!


Ingredients:

-2 cups of sugar

-2 eggs

-1 cup of almond milk

-1 teaspoon of vanilla extract

-1 3/4 cups of flour

-3/4 cup of cocoa powder

-1 1/2 teaspoons of baking powder

-1 1/2 teaspoons of baking soda

-1 teaspoon of salt

-1/2 cup of vegetable oil

-1 cup of boiling water


The one and only substitution to make this recipe dairy free was to swap almond milk for regular milk. Easy peasy. Of course, soy milk or coconut milk would work fine too.

First, preheat the oven to 350 degrees. Grease and flour your pan, or put liners in your cupcake pan. This recipe will make two dozen cupcakes, or two 8″ rounds, or one 12.8″ x 9.5″ sheet cake.

Cream together the eggs and SIFTED sugar (you must sift the sugar, otherwise you’re likely to get lumps). I am a big believer in scraping the sides of the bowl before adding in a new ingredient. If you skip this tedious step, you will end up will lumps of batter on the sides that never got mixed in properly. So, scrape the sides of the bowl. Every time. Or you will regret it.

Next, SIFT in the flour and mix. Scrape the sides of the bowl.

Set your mixer to ‘stir’ and slowly add the milk and the vanilla extract. Scrape the sides of the bowl.

Then you SIFT in the cocoa powder and mix well. While it’s mixing, throw in the baking powder, baking soda, and salt. Once it’s all mixed in, slow your mixer down to the ‘stir’ setting once more, and add the vegetable oil. Then bump it up to speed 2 until it’s mixed in. Scrape the sides of the bowl.

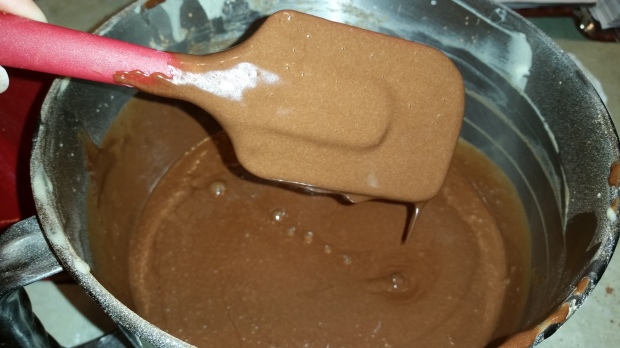
Return the batter to the ‘stir’ setting and SLOWLY add the boiling water. Trust me, splashes of boiling water to the face hurt badly; take your time pouring it in. Once all the water is mixed in, scrape the sides of your bowl one more time and mix in the lumps until your spatula comes out looking like this:

The batter will be very thin

The batter will be very thin

Bake for 20-35 minutes (depending on if you’re making a sheet cake or cupcakes), or until the middle is springy to the touch and a toothpick inserted into the center comes out clean.

I didn’t even get a crappy pan shot of this cake for you guys… Epic fail. The next time I make it, I promise to get the Pinterest picture and update this pathetic post. But for now, you will have to trust me when I say that this cake is the best chocolate cake in the world. Unless you like dry cake, in which case you’ll hate this because it is very moist. But seriously, who in their right mind has ever said, “I’m really in the mood for chocolate cake. But dry cake; non of the moist crap.”

Fresh-Prince-Of-Bell-Airs-Dissaproving-Stare-Reaction-Gif


My thoughts exactly Will Smith.

Dairy Free Moist Vanilla Cake

Like the complete sham that I am, I neglected to get the quintessential Pinterest picture of a single piece of beautifully frosted cake for this recipe. This is my very first recipe post and I’ve already screwed up. What ever will I do with myself?

Although my “finished” product picture is just a crappy pan shot, please trust me when I say that this cake is DELICIOUS. I refuse to produce dry cake, so white cake had been a challenge for me for awhile. Every recipe that I tried was dry, uninspiring, and sad. No one wants to eat sad cake; cake should make you feel happy. This cake makes people happy. It’s moist, fluffy, and delicate, but not so delicate that it can’t hold it’s own. I use this recipe for cupcakes all the time, and they stay put together as you peel the wrapper off. It also works well for layer cakes, standing proudly without any sag.

Like most of the recipes I use, this is not of my own invention. But let’s be honest here–very few people can actually take credit for “inventing” a recipe, and most of them probably died a very long time ago. We all borrow from one another, adding our own tweak here and there. Any cake recipe starts with the same foundation: flour, sugar, fat [butter, shortening, oil], and leavening ingredients [eggs, baking soda, baking powder]. I think it’s silly for anyone to get their panties in a bunch over someone else sharing THEIR recipe; no one has exclusive rights to any one recipe because IT’S BEEN DONE BEFORE. Many times. Before you were born even. But I digress. I will always give credit where credit is earned; I’m not here to try to take credit for anything that is not truly mine. However I refuse to feel guilty for “stealing” someone else’s recipes. If you don’t want people sharing your stuff, then don’t put it on the internet.

This recipe is from Allrecipes.com and can be found here.

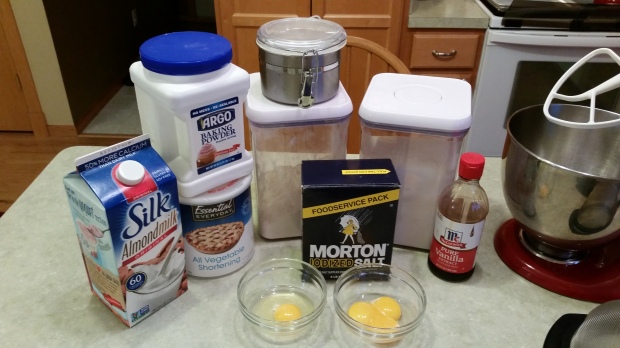
Ingredients you will need:

wpid-20140503_200147.jpg

-1/2 cup of vegetable shortening

-3 teaspoons of water

-2 cups of sugar

-3 egg yolks

-1 whole egg

-2 teaspoons of vanilla extract

-2 cups of flour

-1/2 cup of almond milk

-1/2 teaspoon of salt

-1 teaspoon of baking soda

-1 teaspoon of baking powder

-1 cup of boiling water

There was only one substitution I made to make this into a non-dairy cake: I swapped almond milk for buttermilk. Soy milk is a better substitution for buttermilk because you can “sour” it by adding distilled white vinegar or lemon juice to it. I usually add 4 teaspoons of either the vinegar or the lemon juice for every 1 cup of milk. So for this recipe, use 2 teaspoons. But, you cannot “sour” almond milk. It gets curdled and ruins the overall consistency of the cake. The reason I chose to use almond milk is because my youngest daughter used to have a soy intolerance. She seems to have grown out of it, but as she’s only 1, I’d rather be safe than sorry. The almond milk works fine as a substitute, but if you can use soured soy milk, do that instead.

First things first–preheat the oven to 350 degrees. If you are doing a cake, then grease and flour the pan; if you are doing cupcakes like me, put the liners in (this recipe will make 2 dozen cupcakes, or two 8″ rounds, or one 12.8″ x 9.5″ sheet cake).

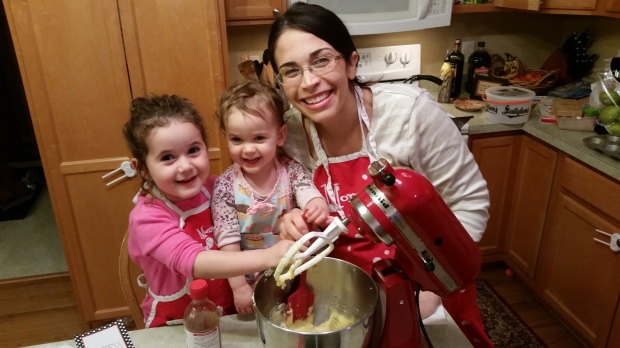
Then you’ll want to enlist the help of adorable tiny humans in aprons to be your assistants.

The sweetest thing

The sweetest thing

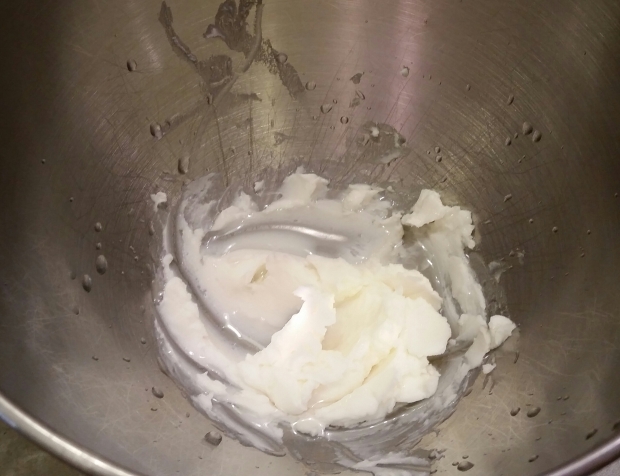
Now, in a large mixing bowl, cream the shortening with the water with the back of a spoon. They will not incorporate; you just want to soften the shortening. If you ever use a baking recipe that requires shortening, always soften it with water first. The ratio is 6 teaspoons of water for every 1 cup of shortening.

wpid-20140503_200342-1.jpg

Next, sift the sugar into the shortening/water mixture, and cream until fluffy (on my Kitchen Aid mixer, I start at the number 2 speed and work up to the number 4 speed for a minute or so). YOU MUST SIFT THE SUGAR. Unless you like lumps in your cake, in which case don’t bother with the sifting.

Also, the kids LOVE the sifting part

Also, the kids LOVE the sifting part

The next step is one that will repeat: scrape the sides of the bowl. To me, this is so important, because otherwise you end up with lumps of ingredients on the sides of your bowl that never got mixed in with the rest of the batter. So every time you add an ingredient you must scrape the bowl before adding the next thing. Yes it’s tedious and you’ll want to skip it every time, but trust me–it’s worth it.

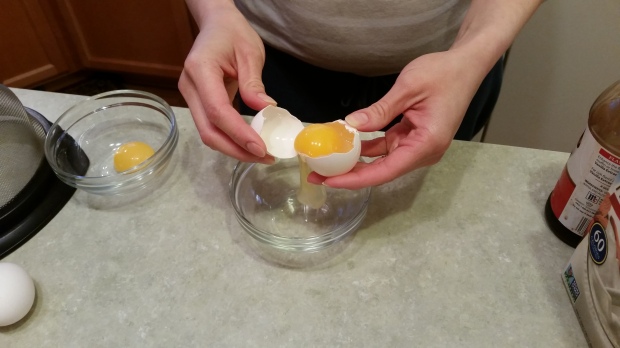
Now it’s time to add the eggs. If you don’t know how to separate eggs, here’s how I do it:

wpid-20140503_195925.jpg

Crack the egg, and gently move the yolk from one part of the shell to the other, allowing the egg white to fall into a bowl. Now the rule with separating eggs goes as such: it’s ok to get a bit of white in your yolk, but you can’t have any yolk in your whites. If you’re making something that requires egg whites, there absolutely cannot be even a spot of yolk in them. The whites will not whip up properly if there is. Egg yolks aren’t as picky; they’re ok if a bit of the white comes along for the ride.

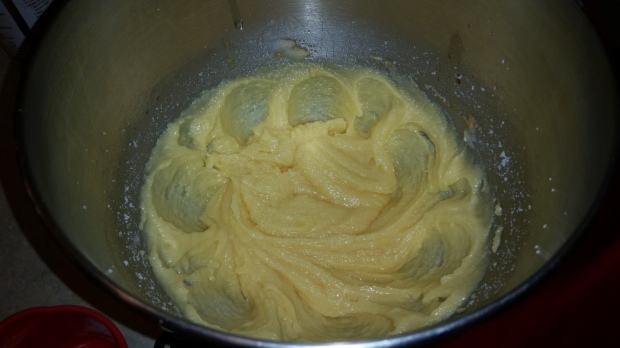
Add each egg yolk and the whole egg one at a time, beating well in between each one. The mixture will get fluffy, as such:

wpid-20140503_201831.jpg

Scrape the sides of the bowl, then add the vanilla extract and mix.

Sift the flour in, and mix until well incorporated. Scrape the sides of the bowl.

While the mixer is on the ‘stir’ setting, slowly pour the milk in. After all the milk has been added, scrape the sides of the bowl.

Add the salt, baking powder and baking soda, and mix. Then scrape the sides of the bowl.

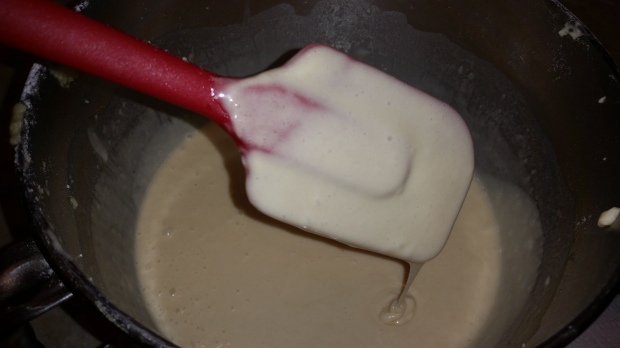
Again, while the mixer is on ‘stir’, SLOWLY pour the boiling water in (please be careful; you don’t want to add it in too fast and get a splash of boiling water to the face). After all of the water has been added, scrape the sides of the bowl one last time and mix in any lumps so that when you lift your flat spatula, it looks like this:

The batter will be very thin

The batter will be very thin

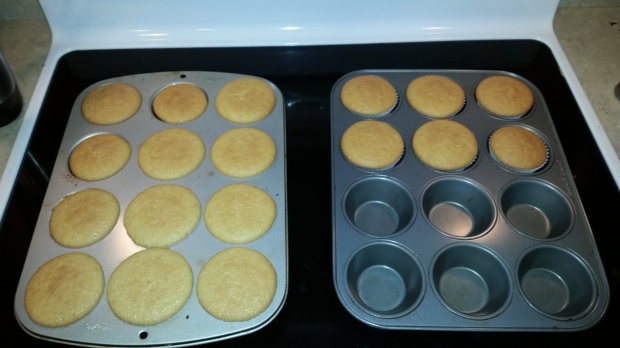
Bake at 350 degrees in a greased pan for 20-30 minutes (depending on if you’re making cupcakes or a sheet cake). You’ll know that the cake is done when the middle is springy to the touch, and when a toothpick inserted into the middle comes out clean.

Trust me--they're delicious!

Trust me–they’re delicious!

Let the cake cool completely before frosting, and enjoy!